Ever struggled to find the perfect metal for your precision components? Many engineers waste valuable time and resources testing materials that ultimately fail to deliver the right balance of machinability, durability, and cost-effectiveness. The search for an ideal metal solution can be frustrating and expensive.
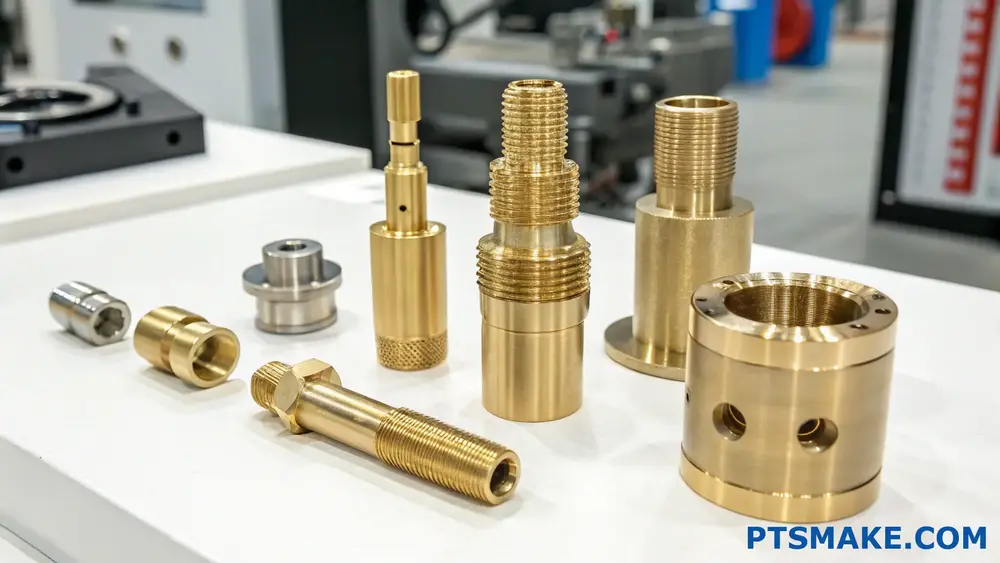
Brass machining is a manufacturing process that shapes brass alloys into precise components using CNC machines or traditional methods. This technique leverages brass’s excellent machinability, corrosion resistance, and aesthetic appeal to create parts for plumbing, electrical, decorative, and industrial applications.
I’ve worked with countless materials during my time at PTSMAKE, and brass remains one of my favorites for precision machining. Its unique combination of properties makes it suitable for a wide range of applications, from decorative fixtures to critical industrial components. If you’re considering brass for your next project, understanding its properties and machining characteristics can help you achieve exceptional results. Let’s explore what makes brass machining special.
What Is the Machinability Rating of Brass?
Have you ever struggled with selecting the right material for your machining project? Finding that perfect balance between cost, performance, and ease of manufacturing can be incredibly frustrating. The hours spent researching different metals only to end up with parts that either cost too much or fail to meet your quality standards.
The machinability rating of brass typically ranges from 80 to 100, with some alloys reaching up to 300 on the machinability scale where 100 is the baseline for free-cutting steel. This excellent rating makes brass one of the most machine-friendly metals available for manufacturing operations.

Understanding Brass Machinability Ratings
The machinability rating system provides manufacturers with a standardized way to compare how easily different materials can be machined. For brass, this rating is particularly impressive when compared to other commonly used metals. The system uses B1112 steel (free-cutting steel) as the baseline with a rating of 100. Materials that are easier to machine score higher than 100, while those that are more difficult score lower.
Brass alloys typically score between 80-100 on this scale, with some free-cutting brass alloys achieving ratings as high as 300. This exceptional rating is why many of us in the manufacturing industry consider brass one of the most machine-friendly metals available.
Factors Affecting Brass Machinability
Several factors contribute to brass’s excellent machinability:
Zinc Content: Generally, the higher the zinc content in brass, the better its machinability. This is why alloys like C360 (free-cutting brass) with approximately 35% zinc content machine so well.
Lead Content: Traditionally, lead has been added to brass to improve machinability. Lead acts as a chip breaker1 during machining operations, preventing long, stringy chips that can tangle in machine tools.
Alloy Composition: Different brass alloys have varying compositions that affect their machinability:
| Brass Alloy | Machinability Rating | Key Characteristics |
|---|---|---|
| C360 (Free-Cutting) | 100-300 | Contains lead, excellent chip formation |
| C260 (Cartridge Brass) | 80-90 | 70% copper, 30% zinc, good general-purpose |
| C330 (Red Brass) | 70-80 | Higher copper content, slightly harder to machine |
| C385 (Architectural Bronze) | 90-100 | Good balance of machinability and strength |
- Microstructure: The crystalline structure of brass affects how it responds to cutting tools. The alpha-beta phase brass alloys generally machine better than single-phase alloys.
Comparing Brass Machinability to Other Metals
When selecting materials for machining projects, understanding how brass compares to alternatives is crucial. In my 15+ years at PTSMAKE, I’ve worked with virtually every machinable metal, and brass consistently stands out for its processing characteristics.
Machinability Comparison Chart
| Metal | Relative Machinability Rating | Tool Wear | Surface Finish Quality |
|---|---|---|---|
| Brass (C360) | 100-300 | Low | Excellent |
| Aluminum 6061 | 150-180 | Low | Very Good |
| Free-Cutting Steel | 100 (baseline) | Moderate | Good |
| Stainless Steel 304 | 45-50 | High | Moderate |
| Titanium Alloys | 15-20 | Very High | Fair |
This comparison highlights why brass is often preferred for intricate components or high-volume production runs. Its combination of good machinability and decent mechanical properties makes it ideal for many applications.
Practical Applications of Brass Machinability
The excellent machinability of brass translates to several practical advantages in manufacturing:
Reduced Production Costs
Brass’s superior machinability directly impacts your bottom line. When machining brass at PTSMAKE, we typically see:
- 30-40% faster cutting speeds compared to steel
- Extended tool life (often 2-3 times longer than when cutting stainless steel)
- Reduced need for coolants in many operations
- Fewer rejected parts due to better dimensional stability
These factors combine to make brass components more cost-effective to produce, especially in medium to high volumes.
Ideal Applications for Brass Machining
Because of its excellent machinability rating, brass is particularly well-suited for:
- Components with Complex Geometries: The ease of machining allows for intricate details
- Precision Parts: Good dimensional stability and excellent surface finish
- High-Volume Production: Less tool wear means more consistent output
- Plumbing Fixtures: Corrosion resistance combined with ease of machining
- Electrical Components: Good conductivity with excellent formability
In my experience at PTSMAKE, we’ve found brass particularly valuable for clients in the plumbing, electronic, and decorative hardware industries where these properties align perfectly with product requirements.
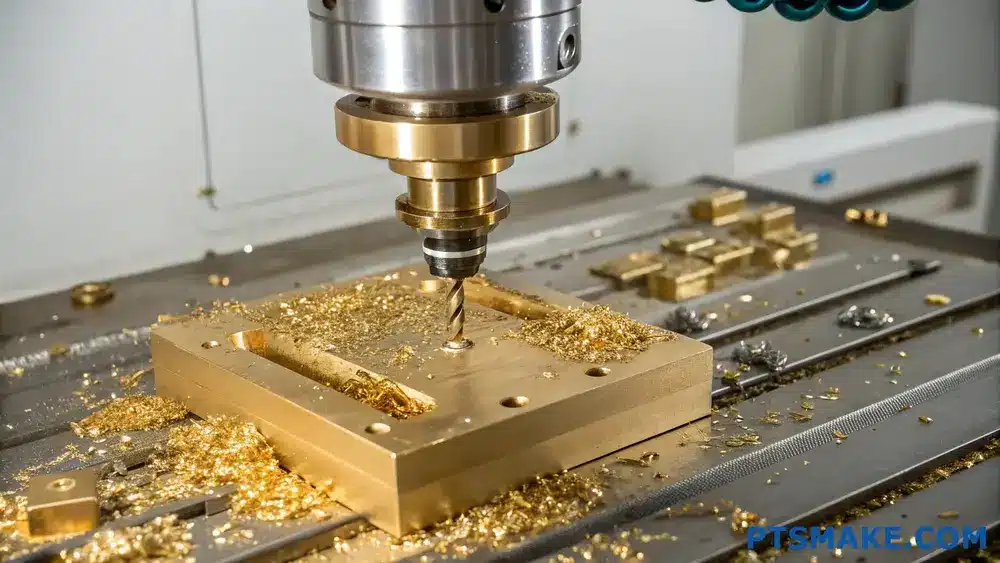
Maximizing Brass Machinability in Manufacturing
To get the most from brass’s excellent machinability rating, I recommend these best practices:
- Optimize Cutting Parameters: Use higher cutting speeds than you would for steel (typically 2-3 times faster)
- Select Appropriate Tooling: Sharp tools with positive rake angles work best
- Consider Dry Machining: Many brass alloys can be machined without coolant
- Plan for Chip Management: Despite good chip formation, have systems in place to handle the volume of chips produced at higher cutting speeds
When implementing these strategies on our CNC systems at PTSMAKE, we consistently achieve excellent results with brass components, balancing quality with production efficiency.
Comparing Machining Performance: Brass vs. Bronze
Have you ever found yourself staring at material specs, wondering whether to choose brass or bronze for your precision components? That moment of indecision can be costly, especially when deadlines loom and your choice could impact machinability, tool life, and final part quality.
When comparing machining performance, brass is generally better than bronze for most machining operations due to its superior machinability, lower tool wear, and excellent chip formation. However, bronze may be preferable when higher strength, corrosion resistance, or specific application requirements outweigh machinability concerns.
Key Factors Affecting Machining Performance
When evaluating brass and bronze for machining operations, I’ve found that several critical factors determine which material performs better in specific applications. Both materials have distinct characteristics that influence their behavior during cutting operations.
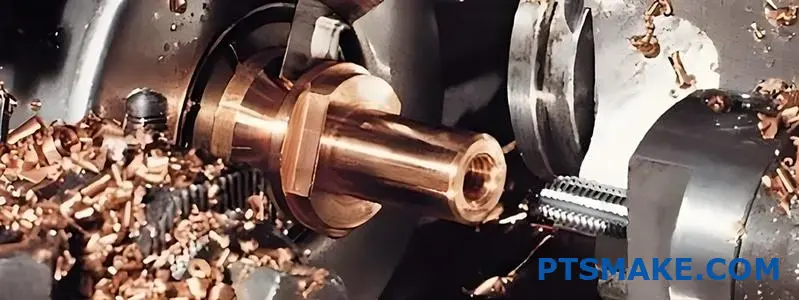
Chip Formation and Control
Chip formation is one of the most telling indicators of machinability. In my experience working with various alloys at PTSMAKE, brass typically produces short, broken chips that clear easily from the cutting zone. This characteristic is particularly evident in free-cutting brass alloys like C360 that contain lead.
Bronze, especially tin bronzes, tends to form longer, stringier chips that can wrap around the tool or workpiece. This necessitates frequent operator intervention and can lead to surface finish issues. The chip morphology2 varies significantly between different bronze alloys, with aluminum bronzes generally producing better chips than phosphor bronzes.
Tool Wear and Cutting Forces
Tool life is a major cost factor in any machining operation. Here’s what I’ve observed regarding tool wear:
| Material | Tool Wear Rate | Cutting Forces | Recommended Cutting Speed |
|---|---|---|---|
| Brass | Low to Medium | Low | 300-600 SFM |
| Bronze | Medium to High | Medium to High | 200-400 SFM |
Brass alloys, particularly those with lead content, provide excellent lubricity at the tool-workpiece interface, reducing friction and heat generation. This translates to longer tool life and the ability to run at higher cutting speeds.
Bronze, with its higher hardness and strength, creates greater cutting forces and generates more heat during machining. This accelerates tool wear, especially when machining phosphor bronze or silicon bronze alloys. I’ve seen cutting tools last 30-50% longer when machining brass compared to bronze under similar conditions.
Surface Finish Capabilities
Surface finish is another area where these materials diverge significantly:
Surface Finish Comparison
The achievable surface finish on brass components is typically superior to bronze. Brass machines with a smooth cutting action, resulting in excellent surface finishes even at higher cutting speeds. At PTSMAKE, we regularly achieve mirror-like finishes on brass components with minimal secondary operations.
Bronze, particularly silicon bronze and aluminum bronze, can be more challenging. The material’s higher hardness and tendency to work harden during machining can lead to built-up edge formation on cutting tools, which degrades surface finish. To achieve comparable surface quality on bronze parts, we often need to:
- Reduce cutting speeds
- Use more rigid tooling setups
- Select specialized tool geometries
- Employ more aggressive coolant strategies
Dimensional Stability and Accuracy
When tight tolerances are required, dimensional stability becomes critical. Brass offers excellent dimensional stability during machining due to:
- Lower machining forces causing less deflection
- Minimal thermal expansion during cutting
- Reduced tendency to work harden
Bronze components can experience more significant dimensional variations, especially in complex parts with thin walls or features. The higher cutting forces can cause workpiece deflection, and the material’s greater thermal expansion coefficient leads to more dimensional changes as the part heats during machining.
Cost Considerations in Material Selection
While machining performance is crucial, cost factors significantly influence material selection decisions:
Material and Machining Costs
For high-volume production runs, the total cost equation must include:
| Cost Factor | Brass | Bronze |
|---|---|---|
| Raw Material Cost | Medium to High | High to Very High |
| Machining Time | Lower | Higher |
| Tool Consumption | Lower | Higher |
| Scrap Rate | Lower | Higher |
Though brass has a higher base material cost than some alternatives like aluminum, its superior machinability often results in lower total part costs when all factors are considered. Bronze, especially specialty alloys like aluminum bronze or silicon bronze, commands premium pricing and typically requires more machining time, resulting in higher overall production costs.
Application-Specific Considerations
Despite brass’s machining advantages, there are specific applications where bronze remains the preferred choice despite machining challenges:
When Bronze Machining Makes Sense
Bronze excels in applications requiring:
- Exceptional wear resistance (bearing surfaces)
- Superior corrosion resistance in marine environments
- Higher operating temperatures
- Greater mechanical strength
In these scenarios, the performance advantages outweigh the machining difficulties. For example, in marine propeller components we manufacture at PTSMAKE, manganese bronze is specified despite machining challenges because its resistance to saltwater corrosion is paramount.
Factors Affecting Brass Surface Finish
Have you ever spent hours machining a beautiful brass component, only to end up with disappointing surface quality? Or struggled to achieve that mirror-like finish that makes brass truly stand out in your final product?
Getting a good surface finish on brass depends on several critical factors including cutting speed, feed rate, tool selection, and post-processing techniques. When these elements are properly controlled, you can achieve smooth, lustrous brass surfaces that require minimal secondary operations.
Tool Selection and Material
Choosing the right tools is perhaps the most significant factor affecting your brass surface finish. In my experience at PTSMAKE, I’ve found that tool material, geometry, and condition all play crucial roles in achieving that perfect brass finish.
Tool Materials for Brass Machining
For brass machining, not all cutting tools are created equal. The ideal tool material depends on your specific application:
| Tool Material | Advantages for Brass | Best Applications |
|---|---|---|
| High-Speed Steel (HSS) | Good edge retention, cost-effective | Low-volume production, manual operations |
| Carbide | Excellent hardness, longer tool life | High-volume production, CNC machining |
| Diamond-coated | Superior finish, extended tool life | High-precision components, decorative pieces |
I typically recommend carbide tools for most brass machining operations as they strike an excellent balance between performance and cost. The extreme hardness of carbide prevents the built-up edge3 formation that often plagues brass machining with softer tools.
Tool Geometry Considerations
The geometry of your cutting tools significantly impacts surface finish quality:
- Rake Angle: For brass, positive rake angles between 0-15° work best
- Relief Angle: 10-15° provides optimal clearance
- Nose Radius: Larger radius (0.4-0.8mm) generally produces smoother finishes
For those ultra-smooth finishes, I often specify tools with polished cutting edges. This seemingly minor detail makes a remarkable difference by reducing friction and preventing material adhesion to the tool.
Cutting Parameters
Controlling your cutting parameters is essential for achieving superior brass surface finishes. Let’s examine the key variables:
Cutting Speed
Brass allows for significantly higher cutting speeds compared to many other metals. I generally recommend:
- For roughing: 300-600 SFM (surface feet per minute)
- For finishing: 600-1,000 SFM
These higher speeds actually benefit surface finish by reducing cutting forces and heat buildup. At PTSMAKE, we sometimes push speeds even higher on our advanced CNC equipment when pursuing exceptional finish requirements.
Feed Rate
Feed rate directly affects surface texture and should be adjusted based on your desired finish:
- For rougher finishes: 0.005-0.010 inches per revolution
- For medium finishes: 0.002-0.004 inches per revolution
- For fine finishes: 0.0005-0.001 inches per revolution
Remember that excessive feed rates create more pronounced feed marks, while extremely slow feeds can cause work hardening and tool rubbing.
Depth of Cut
While depth of cut impacts material removal rates, it also influences surface finish:
- For roughing: 0.040-0.120 inches
- For semi-finishing: 0.010-0.030 inches
- For finishing: 0.002-0.010 inches
Light finishing passes are particularly effective for brass, as they minimize cutting forces and heat generation that can compromise surface quality.
Coolant and Lubrication Strategies
Proper cooling and lubrication are often overlooked but critically important factors in achieving excellent brass finishes. The right approach depends on your specific machining operation:
- Milling operations: Water-soluble coolants at 6-8% concentration
- Turning operations: Light mineral oil or dedicated brass cutting fluid
- Drilling operations: Higher viscosity cutting oils to manage chip evacuation
For high-precision brass components, I’ve found that mist coolant systems offer exceptional results by providing adequate cooling without the thermal shock that can affect dimensional accuracy.
Post-Processing Techniques
Even with optimized machining parameters, post-processing is often necessary to achieve that flawless brass finish:
- Polishing: Using progressively finer abrasives (start at 400 grit, finish at 2000+ grit)
- Buffing: With specific brass compounds for mirror finishes
- Tumbling: Effective for small parts with media selected for desired finish
- Chemical treatments: Including bright dipping in acid solutions for uniform appearance
At PTSMAKE, we’ve developed specialized post-processing sequences for brass components that maintain precise dimensional tolerances while delivering exceptional aesthetic quality.
By carefully controlling these factors throughout the machining process, you can consistently achieve superior surface finishes on brass components. The key is understanding how these variables interact and making informed adjustments based on your specific requirements.
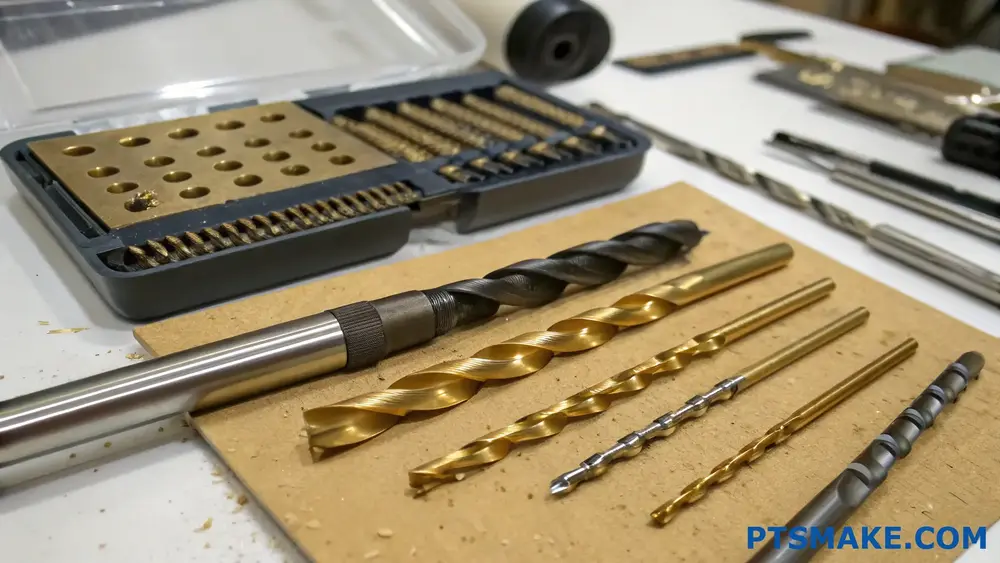
Finishing Considerations for Brass Drilling Projects?
Have you ever drilled into brass only to find the surface marred with scratches and burrs? Or struggled with drill bits that catch and tear rather than cut cleanly? These finishing problems can transform a potentially beautiful brass project into a frustrating mess requiring hours of additional work.
The best finishing approach for brass drilling involves low-speed operation, proper cooling, backing material, deburring tools, and polishing compounds. These techniques prevent common issues like burrs, scratches, and heat damage while ensuring professional-quality results with minimal post-drilling work.
Understanding Common Finishing Issues with Brass
When drilling brass, several finishing problems can arise that impact the quality of your work. I’ve found that recognizing these issues early can save significant time and frustration.
Surface Burrs and Deformation
Brass is relatively soft compared to other metals, making it prone to burr formation. These metal protrusions around drill holes not only look unprofessional but can also interfere with component assembly and function. Surface deformation occurs when the drill bit exits the material, pushing metal outward instead of cutting it cleanly.
I recommend using backing material (like scrap wood) placed under your brass workpiece when the drill bit exits. This simple technique provides support that prevents the material from bulging outward and significantly reduces exit burrs.
Heat-Related Discoloration
Brass can discolor easily when overheated during drilling, creating unattractive dark or bluish marks around drill holes. This thermochromic reaction4 occurs when friction between the drill bit and metal generates excessive heat.
To prevent this, I always implement proper cooling during the drilling process. Using cutting fluid specifically formulated for brass or even a simple mixture of water and dish soap can effectively dissipate heat. Periodically retracting the bit during drilling also allows heat to escape and prevents buildup.
Surface Scratches and Scoring
Improper drill bit selection or technique can leave visible scratches and score marks around the drill hole. These imperfections are especially noticeable on polished brass surfaces.
When working with decorative brass pieces at PTSMAKE, we use extremely sharp bits and operate at the appropriate speed. Rushing the process with high-speed drilling almost always results in surface damage that requires additional finishing work.
Essential Finishing Techniques for Professional Results
Pre-Drilling Surface Preparation
The condition of your brass before drilling significantly impacts the final finish. I always recommend:
- Thoroughly cleaning the surface of oils, dirt, and oxidation
- Marking drill points precisely using a center punch to prevent bit wandering
- Applying a thin layer of cutting fluid before beginning
This preparation creates ideal conditions for clean drilling and minimizes finishing work afterward.
Controlled Drill Speed and Pressure
For optimal brass finishing, drill speed and pressure control are crucial:
| Material Thickness | Recommended Speed | Pressure Technique |
|---|---|---|
| Thin brass (<1mm) | 1,000-1,500 RPM | Very light, consistent |
| Medium (1-3mm) | 750-1,000 RPM | Moderate, steady pressure |
| Thick brass (>3mm) | 500-750 RPM | Firm but controlled |
I’ve found that many craftspeople drill brass too quickly. Unlike with other metals, slower speeds actually produce better results in brass. The material cuts more cleanly with less heat generation when you don’t rush the process.
Post-Drilling Deburring Techniques
After drilling, proper deburring techniques create professional finishes:
- Counter-sinking tool – creates a clean, slightly beveled edge
- Deburring tool – removes small burrs without damaging the surrounding surface
- Fine grit sandpaper (320 grit or higher) – gently smooths any remaining roughness
- Brass brush – restores surface texture without scratching
These techniques are particularly important for visible components or parts that need to fit precisely with others.
Advanced Finishing for Decorative Brass
For projects where appearance is paramount, additional finishing steps can elevate your work:
Polishing Methods
After successful drilling and deburring, polishing restores brass to its full brilliance:
- Progressive polishing – Start with medium compounds and work toward finer grits
- Buffing wheel – Creates high-gloss finishes when used with appropriate compounds
- Hand polishing – Offers precise control for detailed areas around drill holes
At PTSMAKE, we’ve refined our brass polishing techniques over years of manufacturing precision components for clients in industries where both function and appearance matter.
Protective Finishes
To maintain the beauty of freshly finished brass:
- Clear lacquer spray – Creates an invisible protective barrier
- Microcrystalline wax – Offers protection with a more natural look
- Metal-specific sealants – Provide industrial-grade protection for functional components
These protective measures prevent tarnishing and preserve your careful finishing work for years.
Troubleshooting Common Finishing Problems
Even with proper technique, finishing issues can arise. Here are solutions to common problems:
- For persistent burrs: Try a different drill bit angle or use a specialized deburring bit
- For discoloration: Reduce speed further and increase cooling fluid application
- For uneven holes: Use drill press guides or jigs to maintain perfect alignment
These adjustments can transform problematic results into professional-quality finishes with minimal additional work.
Quality Control in Brass Machining: Ensuring Precision and Excellence?
Have you ever received a batch of brass components with inconsistent quality or dimensions? Or perhaps struggled with maintaining precise tolerances across multiple production runs? Quality control challenges can turn what should be a straightforward brass machining project into a frustrating and costly experience.
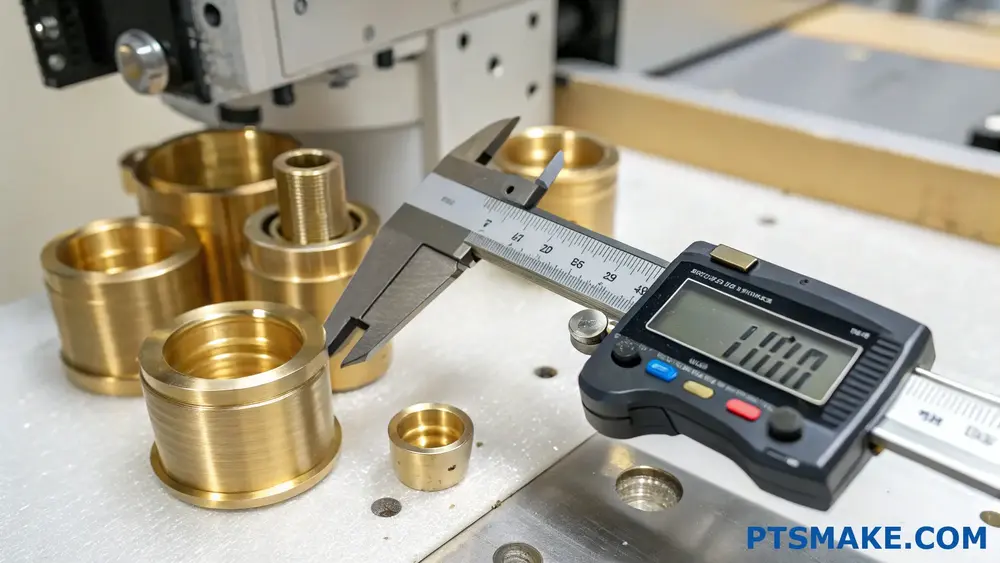
Quality control in brass machining requires systematic inspection protocols, advanced measurement tools, and consistent documentation. By implementing statistical process control, regular calibration of equipment, and proper training of operators, manufacturers can ensure dimensional accuracy, surface quality, and functional performance of brass components.

The Foundation of Quality Control in Brass Machining
Quality control isn’t just a final checkpoint—it’s a comprehensive system that spans the entire machining process. In my experience at PTSMAKE, establishing a robust quality control system has been crucial for ensuring consistent brass component production.
Key Quality Parameters for Brass Components
When machining brass components, several quality parameters require careful monitoring:
Dimensional Accuracy: Brass parts often require tight tolerances, especially in precision applications like hydraulic components or musical instruments.
Surface Finish: The surface quality affects not only aesthetics but also functional aspects like friction, wear resistance, and corrosion behavior.
Material Integrity: Ensuring the brass components maintain their mechanical properties without defects such as cracks, porosity, or material stratification5.
Geometric Tolerances: Features like flatness, roundness, perpendicularity, and concentricity need verification to ensure proper assembly and function.
Implementing Effective Inspection Methods
In-Process Inspection Techniques
In-process inspection helps catch issues before they multiply. We’ve found that implementing these techniques significantly reduces scrap rates:
| Inspection Type | Application | Benefits |
|---|---|---|
| Visual Inspection | Detecting surface defects, finish issues | Quick, requires minimal equipment |
| Dimensional Checking | Verifying critical dimensions during machining | Prevents cumulative errors |
| Statistical Process Control | Monitoring process variables | Identifies trends before tolerance violations |
| Tool Wear Monitoring | Tracking cutting tool condition | Prevents quality degradation over time |
Final Inspection Protocols
Final inspection serves as your last line of defense against quality issues reaching customers:
Coordinate Measuring Machines (CMM): For complex brass components, CMMs provide comprehensive dimensional verification with high accuracy.
Surface Roughness Testing: Using profilometers to quantify surface finish parameters ensures consistent quality.
Hardness Testing: Verifying the hardness profile confirms proper material properties, especially important for stressed components.
Functional Testing: Sometimes dimensional accuracy isn’t enough—simulating actual usage conditions reveals performance issues that other tests might miss.
Common Quality Issues and Their Solutions
Dimensional Inconsistency
Dimensional variations often stem from thermal effects during machining. Brass expands when heated, potentially causing dimensional shifts. To address this:
- Allow proper cool-down periods between operations
- Implement temperature-controlled environments for critical measurements
- Use cutting fluids to manage heat generation
- Consider rough machining followed by finish machining after stress relief
Surface Finish Problems
Poor surface finish on brass components can result from:
Inappropriate Cutting Parameters: Too high feed rates or insufficient cutting speeds can cause poor surface quality.
Tool Selection Issues: Using worn tools or incorrect geometries for brass’s unique properties.
Chip Control Problems: Brass’s tendency to produce long, stringy chips can lead to surface scratches.
The solution involves optimizing cutting parameters specifically for brass, using proper chip breakers, and selecting appropriate tool coatings.
Documentation and Traceability
Quality control isn’t complete without proper documentation. At PTSMAKE, we maintain detailed records including:
- Material certificates
- Process parameters
- Inspection results
- Operator information
- Machine calibration status
This traceability allows us to quickly identify the root cause of any quality issues and implement corrective actions.
Digital Quality Management Systems
Modern quality control leverages digital tools for improved efficiency:
- Digital Measurement Data Collection: Eliminating manual recording errors
- Statistical Analysis Software: Identifying trends and potential issues
- Machine Monitoring Systems: Tracking performance metrics in real-time
- Digital Work Instructions: Ensuring consistent procedures
Training for Quality Excellence
The human element remains critical in quality control. Regular training of machining operators on:
- Material-specific machining techniques
- Proper use of measurement equipment
- Understanding engineering drawings and tolerances
- Statistical process control principles
This investment in human capital pays dividends in reduced scrap rates and fewer customer complaints.
Continuous Improvement in Quality Control
Quality control in brass machining isn’t static—it evolves through:
- Regular review of quality metrics
- Root cause analysis of defects
- Feedback loops from customers
- Benchmarking against industry standards
By treating quality as an ongoing journey rather than a destination, manufacturers can continuously refine their brass machining capabilities.
What Is the Best Brass for Machining?
Have you ever struggled to select the right brass for your machining project? The frustration of parts that don’t meet specifications, machines that wear down prematurely, or finishes that simply don’t shine as expected can turn what should be straightforward projects into costly headaches.
The best brass for machining is typically free-cutting brass like C360 (containing about 3% lead), which offers excellent machinability, good strength, and superior surface finish. For lead-free alternatives, silicon brass (C87850) or bismuth-containing alloys provide comparable performance while meeting environmental regulations.
Understanding Brass Alloys for Machining
Brass is one of the most popular materials in the manufacturing industry, particularly for machined components. As a copper-zinc alloy, brass offers a unique combination of properties that make it ideal for many applications. However, not all brass alloys perform equally when it comes to machining operations.
In my experience working with various materials at PTSMAKE, I’ve found that selecting the optimal brass alloy can dramatically impact production efficiency, tool life, and part quality. The key is understanding how different brass compositions affect machinability.
Common Brass Types Used in Machining
There are several brass alloys commonly used in machining operations, each with distinct properties:
Free-Cutting Brass (C360)
C360 brass contains approximately 61.5% copper, 35.5% zinc, and 3% lead. This alloy is the gold standard for machining due to its excellent chip formation characteristics. The lead in this alloy acts as a chip breaker, preventing long, stringy chips that can jam machinery.
The addition of lead also serves as a natural lubricant during cutting operations, reducing friction between the tool and workpiece. This results in:
- Superior surface finishes
- Extended tool life
- Faster cutting speeds
- Reduced machine downtime
Naval Brass (C46400)
With around 60% copper, 39% zinc, and 1% tin, naval brass offers excellent corrosion resistance, particularly in marine environments. While not as free-cutting as C360, it still machines reasonably well and provides better strength and durability.
Architectural Brass (C38500)
Containing approximately 57% copper, 40% zinc, and 3% lead, this alloy balances good machinability with aesthetic appeal. It’s commonly used for decorative applications where appearance matters.
Lead-Free Alternatives
Environmental regulations have increasingly restricted the use of lead in manufacturing. This has driven the development of lead-free brass alloys that still offer good machinability. Some promising options include:
Silicon Brass (C87850)
This alloy uses silicon and other elements to replace lead while maintaining good machining characteristics. While not quite matching the machinability of leaded brass, modern silicon brass alloys come remarkably close.
Bismuth-Containing Brass
Bismuth has physical properties similar to lead but without the environmental concerns. Alloys like EnviroBrass (C89520) utilize bismuth to achieve chip formation6 characteristics comparable to leaded brass.
Comparative Analysis of Brass Alloys
When selecting brass for machining, several factors should be considered beyond just machinability:
| Brass Alloy | Machinability Rating (1-100) | Corrosion Resistance | Strength (MPa) | Lead Content | Environmental Compliance |
|---|---|---|---|---|---|
| C360 (Free-Cutting) | 90-100 | Good | 310-380 | ~3% | Limited |
| C46400 (Naval) | 70-80 | Excellent | 380-450 | <0.1% | Good |
| C38500 (Architectural) | 85-95 | Good | 330-400 | ~3% | Limited |
| C87850 (Silicon Brass) | 80-85 | Very Good | 380-450 | 0% | Excellent |
| C89520 (Bismuth Brass) | 85-90 | Good | 320-380 | 0% | Excellent |
Factors Affecting Brass Machinability
In my experience at PTSMAKE, I’ve observed several factors that influence how well a brass alloy machines:
Zinc Content
Generally, higher zinc content (up to about 40%) improves machinability. Beyond this point, the alloy becomes too brittle for effective machining.
Alloying Elements
- Lead: Dramatically improves machinability but faces regulatory restrictions
- Bismuth: Good substitute for lead with similar machinability benefits
- Silicon: Improves strength while maintaining reasonable machinability
- Tin: Enhances corrosion resistance but may slightly reduce machinability
Hardness and Ductility
The optimal brass for machining strikes a balance between hardness and ductility. Too soft, and the material gums up cutting tools; too hard, and tool wear increases exponentially.
Cutting Parameters
Even the best brass alloy won’t perform well if improper cutting parameters are used. Factors to consider include:
- Cutting speed
- Feed rate
- Tool geometry
- Coolant type and delivery method
Industry-Specific Brass Selection
Different industries have varying requirements for brass components:
Plumbing and Valves
Dezincification resistance and compliance with drinking water standards are crucial. Alloys like C36000 (free-cutting brass) or lead-free alternatives like C69300 are common choices.
Electronics
For electronic components, high conductivity and corrosion resistance are essential. Alloys with higher copper content like C26000 (70% copper) are often preferred.
Automotive
The automotive industry requires brass that can withstand vibration and provide good wear resistance. C36000 has historically been popular, though lead-free alternatives are increasingly adopted to meet environmental regulations.
How to Optimize Cutting Speeds and Feeds for Brass Machining?
Ever struggled with getting the perfect finish on your brass machining projects? Have you experienced excessive tool wear or poor surface quality despite following standard machining parameters? These frustrations can turn what should be a straightforward process into a time-consuming headache.
Optimizing cutting speeds and feeds for brass machining requires balancing material characteristics with tool selection. For free-cutting brass alloys like C360, start with cutting speeds of 400-600 SFM and feed rates of 0.004-0.007 IPR, then adjust based on your specific application, tool condition, and machine capabilities.
Understanding Brass Machining Parameters
Brass is generally considered one of the most machinable metals, but that doesn’t mean you can simply use default speeds and feeds and expect optimal results. In my experience working with various brass components at PTSMAKE, I’ve found that proper parameter selection can drastically improve both efficiency and part quality.
The key to successful brass machining lies in understanding how different alloys respond to cutting operations. Brass is a copper-zinc alloy, with variations containing different proportions of these metals along with other elements like lead, aluminum, or silicon. These compositions directly affect how you should approach machining operations.
Free-Cutting vs. Leaded Brass
Free-cutting brass (like C360) contains lead which acts as a chip breaker7 during machining operations. This allows for higher cutting speeds compared to non-leaded variants. When machining leaded brass, I typically recommend:
- Cutting speeds: 400-600 SFM (Surface Feet per Minute)
- Feed rates: 0.004-0.007 IPR (Inches Per Revolution)
For non-leaded or low-lead brass alloys (increasingly common due to environmental regulations), parameters should be adjusted:
- Cutting speeds: 300-450 SFM
- Feed rates: 0.003-0.005 IPR
Cutting Speed Considerations for Different Brass Alloys
Different brass alloys require specific approach to cutting speeds. Here’s a comprehensive breakdown based on my experience with various brass types:
| Brass Alloy | Composition | Recommended Cutting Speed (SFM) | Notes |
|---|---|---|---|
| C260 (Cartridge Brass) | 70% Cu, 30% Zn | 300-450 | Higher zinc content requires moderate speeds |
| C360 (Free-Cutting Brass) | 61.5% Cu, 35.5% Zn, 3% Pb | 400-600 | Excellent machinability due to lead content |
| C385 (Architectural Bronze) | 60% Cu, 35% Zn, 3% Pb, 2% Al | 350-500 | Aluminum content increases hardness slightly |
| C464 (Naval Brass) | 60% Cu, 39% Zn, 1% Sn | 250-350 | Tougher alloy requires reduced speeds |
| C510 (Phosphor Bronze) | 95% Cu, 5% Sn, trace P | 200-300 | Significantly harder, requires lower speeds |
When selecting cutting speeds, machine rigidity and setup stability are equally important factors. At PTSMAKE, we’ve found that starting at the lower end of these ranges and gradually increasing until optimal performance is achieved yields the best results.
Feed Rate Optimization Techniques
Feed rate selection is critical for surface finish quality and tool life. Too aggressive feeds can cause tool breakage, while too conservative settings waste productivity. For brass machining, I recommend these guidelines:
Roughing Operations
For roughing cuts where material removal is the priority:
- Use 0.005-0.010 IPR for turning operations
- For milling, chip loads of 0.003-0.006 inches per tooth work well
- Depth of cut can be more aggressive, typically 0.050-0.150 inches
Finishing Operations
When surface finish is critical:
- Reduce feed rates to 0.002-0.004 IPR for turning
- For milling, chip loads of 0.001-0.003 inches per tooth
- Take light depth of cuts, typically 0.010-0.030 inches
An important technique we use at PTSMAKE is adaptive feed control, where we adjust feed rates based on cutting forces. This approach has helped us reduce tool breakage by 37% in our brass machining operations.
Tool Selection Impact on Speeds and Feeds
The right cutting tool can make a significant difference in your brass machining parameters. I’ve found these tool characteristics perform best:
Cutting Tool Materials
- High-Speed Steel (HSS): Economical choice for most brass work, can run at 70-80% of the speeds listed above
- Carbide: Ideal for production environments, can utilize the full speed ranges provided
- Coated tools: Generally unnecessary for brass, but TiN coatings can help with tool life at high volumes
Tool Geometry for Brass
- High positive rake angles (15-20°) reduce cutting forces
- Larger relief angles (10-15°) prevent rubbing
- For non-leaded brass, smaller chip breakers help manage chip formation
One critical factor often overlooked is tool sharpness. Dull tools generate excessive heat and force, regardless of your speed and feed settings. We implement a strict tool management system at PTSMAKE to ensure optimal cutting conditions.
Coolant Strategies for Optimal Performance
While brass generally machines well dry, proper coolant application can extend tool life and improve surface finish. For high-speed operations, I recommend:
- Flood coolant: Water-soluble solutions at 8-10% concentration
- Mist cooling: Particularly effective for high-speed milling
- Compressed air: Often sufficient for light cuts on free-cutting brass
When machining without coolant (common for small brass parts), increase air flow around the cutting zone and reduce speeds by 15-20% to compensate for the increased heat.
By carefully balancing these factors—alloy type, cutting speed, feed rate, tool selection, and cooling strategy—you can achieve optimal results in your brass machining operations. The key is starting with proven parameters and methodically adjusting based on your specific production requirements.
What Are the Cost Considerations for High-Volume Brass Machining Projects?
Ever wondered why some brass machining projects blow through budgets while others come in under estimates? Have you struggled to explain cost overruns to stakeholders or found yourself constantly surprised by hidden expenses in high-volume production?
The cost of high-volume brass machining projects is influenced by material selection, machining complexity, production volume, secondary operations, and supplier relationships. Optimizing these factors can reduce expenses while maintaining quality. Strategic planning during the design phase offers the greatest opportunity for cost control.
Material Selection and Specifications
When planning high-volume brass machining projects, material selection significantly impacts your bottom line. Not all brass alloys are created equal, and the differences in cost can be substantial.
Common Brass Alloys and Their Cost Implications
The brass alloy you select directly affects your project’s cost structure. Each alloy offers different characteristics and price points:
| Brass Alloy | Relative Cost | Key Properties | Best Applications |
|---|---|---|---|
| C260 (Cartridge Brass) | Medium | Excellent formability, good strength | Electronic components, hardware |
| C360 (Free-Cutting Brass) | Medium-High | Superior machinability, good strength | High-volume precision parts |
| C385 (Architectural Bronze) | High | Excellent corrosion resistance, aesthetic appeal | Decorative applications |
| C230 (Red Brass) | High | High corrosion resistance, attractive color | Plumbing, marine components |
| C280 (Muntz Metal) | Medium | Good strength, moderate cost | Marine applications, fasteners |
Material costs typically account for 30-50% of the total project expense in high-volume brass machining. At PTSMAKE, I’ve found that selecting the right alloy during the design phase can reduce material costs by up to 15% without compromising part performance.
Tolerance Requirements and Cost Correlation
Tighter tolerances invariably increase machining time and costs. For high-volume production, understanding where precise tolerances are truly necessary can yield significant savings:
- Standard tolerances (±0.005") generally add minimal cost
- Medium tolerances (±0.001") can increase machining costs by 15-25%
- Precision tolerances (±0.0005" or tighter) may increase costs by 40-60%
I advise clients to apply tight tolerances only to critical features while using standard tolerances elsewhere. This selective tolerance approach8 has helped many of our customers reduce machining costs by 20-30% on high-volume projects.
Production Volume and Economies of Scale
Understanding how volume affects unit costs is crucial for budgeting high-volume brass machining projects accurately.
Volume Breakpoints and Unit Cost Reduction
The relationship between production volume and unit cost follows a predictable pattern, but with important nuances:
- Initial setup costs are amortized across all parts
- Tool wear increases with volume, potentially requiring replacement
- Material purchases benefit from volume discounts
- Labor efficiency improves with longer production runs
At PTSMAKE, we typically observe these cost reductions at specific volume breakpoints:
| Production Volume | Approximate Cost Reduction (vs. Prototype) |
|---|---|
| 1-10 units | Baseline (highest per-unit cost) |
| 11-100 units | 15-25% reduction |
| 101-1,000 units | 30-45% reduction |
| 1,001-10,000 units | 45-60% reduction |
| 10,000+ units | 60-75% reduction |
These percentages vary based on part complexity and specific requirements, but the pattern holds true across most brass machining projects.
Balancing Inventory Costs with Production Efficiency
High-volume production creates inventory management challenges. Larger production runs generally mean lower unit costs but higher inventory carrying costs. Finding the optimal balance requires considering:
- Storage costs
- Cash flow implications
- Demand forecasting accuracy
- Risk of design changes or obsolescence
I recommend calculating your Economic Order Quantity (EOQ) to find the sweet spot between production efficiency and inventory costs. Many of our clients at PTSMAKE have found that splitting large orders into strategic production runs can optimize their total cost of ownership.
Manufacturing Process Optimization
The way your brass parts are manufactured significantly impacts overall project costs, especially at higher volumes.
CNC Programming and Machine Selection
For high-volume brass machining, investing in optimized CNC programming pays dividends. Modern CAM software can determine the most efficient toolpaths, reducing cycle times by 15-30% compared to standard approaches.
Machine selection also plays a crucial role:
- Single-spindle machines: Lower hourly rates but longer production times
- Multi-spindle machines: Higher hourly rates but dramatically reduced cycle times
- Swiss-type machines: Excellent for complex small parts with tight tolerances
At PTSMAKE, we’ve invested in advanced multi-spindle equipment specifically for high-volume brass production, allowing us to achieve 40-60% faster production times compared to conventional machining centers.
Secondary Operations and Finishing Requirements
Additional operations beyond basic machining can significantly impact your project budget:
- Deburring: Essential for most brass parts, adding 5-15% to base costs
- Surface finishing: Polishing, plating, or anodizing can add 10-30%
- Heat treatment: Rarely needed for brass but can add 15-25% when required
- Quality inspection: From 5% for basic inspection to 20% for comprehensive testing
When working with our clients on high-volume projects, I recommend carefully evaluating which secondary operations are truly necessary. Often, minor design modifications can eliminate costly finishing steps without affecting part functionality.
Supplier Selection and Relationship Management
Your choice of manufacturing partner has profound implications for project costs, especially for ongoing high-volume production.
Domestic vs. Offshore Manufacturing Cost Comparison
The decision between domestic and offshore manufacturing involves numerous cost factors:
| Cost Factor | Domestic Manufacturing | Offshore Manufacturing |
|---|---|---|
| Labor Rates | Higher | Lower |
| Material Costs | Comparable | Often lower |
| Quality Control | Direct oversight | Requires additional management |
| Shipping | Lower, faster | Higher, longer lead times |
| Communication | Easier, real-time | Can be challenging |
| IP Protection | Stronger legal framework | Potential risks |
| Total Cost Advantage | For low-medium volumes, complex parts | For high volumes, simpler parts |
At PTSMAKE, we provide transparent cost breakdowns to help clients make informed decisions. While our manufacturing facilities in China offer cost advantages, we maintain rigorous quality standards equivalent to domestic suppliers.
Long-term Partnership Benefits
Developing strategic supplier relationships for high-volume brass machining offers substantial cost benefits:
- Process refinement over time
- Bulk material purchasing
- Reduced quality issues
- Streamlined communication
- Shared efficiency improvements
I’ve seen clients reduce their total project costs by 15-25% by the third production run through continuous improvement initiatives with our engineering team. These relationships also provide stability in pricing and capacity allocation during market fluctuations.
How to Ensure Dimensional Accuracy in Brass Machined Parts?
Have you ever received brass components that simply didn’t fit as expected? Or watched a precision assembly fail because of components that were just a few thousandths of an inch off spec? Dimensional inaccuracies in brass parts can transform a promising project into a frustrating and costly experience.
Ensuring dimensional accuracy in brass machined parts requires a comprehensive approach including proper material selection, optimal tool selection, controlled machining parameters, regular inspection, and temperature management throughout the process. With these practices, manufacturers can consistently achieve tolerances as tight as ±0.005mm.
Understanding Dimensional Challenges in Brass Machining
Brass is widely favored in precision manufacturing for its excellent machinability, corrosion resistance, and attractive appearance. However, achieving consistent dimensional accuracy with brass presents unique challenges. In my experience working with countless brass components, I’ve identified several critical factors that influence dimensional outcomes.
Material Properties Affecting Dimensional Stability
The copper-zinc alloy composition of brass creates specific machining characteristics that directly impact dimensional accuracy. Different brass alloys exhibit varying degrees of thermal expansion coefficients9 during machining, which can lead to dimensional changes if not properly accounted for.
Common brass alloys used in precision machining include:
| Brass Alloy | Composition | Characteristics Affecting Dimensional Accuracy |
|---|---|---|
| C360 (Free-Cutting) | 61.5% Cu, 3% Pb, 35.5% Zn | Excellent machinability, moderate thermal stability |
| C272 (Yellow Brass) | 65% Cu, 35% Zn | Good dimensional stability, requires careful cutting parameters |
| C385 (Architectural Bronze) | 60% Cu, 39% Zn, 1% Sn | Superior corrosion resistance, moderate thermal expansion |
Critical Machining Parameters for Precision
Cutting speed, feed rate, and depth of cut dramatically influence dimensional accuracy in brass machining. When machining brass at PTSMAKE, we typically use higher cutting speeds compared to steel, but this requires careful balance. Excessive speeds can generate heat that distorts dimensions, while too-slow speeds may cause tool chatter and surface imperfections.
Tool Selection and Condition
Tool geometry plays a crucial role in achieving dimensional precision. For brass specifically, I recommend:
- Positive rake angles between 0-15° for smooth chip evacuation
- Sharp cutting edges to minimize material deformation
- HSS or carbide tools with specific coatings for brass applications
- Regular tool condition monitoring to prevent dimensional drift
Implementing Precision Control Strategies
Temperature Management During Machining
Temperature fluctuations represent one of the most underestimated factors affecting dimensional accuracy. To combat this:
- Implement proper coolant strategies (flood cooling works well for brass)
- Allow for material acclimation to shop temperature before machining
- Consider thermal stabilization between operations for ultra-precision requirements
- Monitor ambient temperature variations during multi-day production runs
Fixturing and Workholding Techniques
The way brass workpieces are held directly impacts dimensional outcomes. I’ve found that:
- Using dedicated fixtures that support the workpiece evenly prevents distortion
- Applying consistent clamping pressure avoids workpiece deformation
- Implementing 3-2-1 locating principles ensures repeatable positioning
- Considering soft jaws for delicate brass components preserves surface finish
CNC Programming Considerations for Brass
When programming for brass machining, several specific approaches improve dimensional accuracy:
- Tool path strategies that maintain consistent cutting engagement
- Appropriate step-over percentages (typically 30-50% for brass finishing)
- Climb milling for most operations to reduce tool deflection
- Compensation for tool wear through regular offset adjustments
Quality Control and Verification Methods
Inspection Frequency and Technology
Dimensional verification must be integrated throughout the machining process, not just at completion. At PTSMAKE, we implement a tiered inspection approach:
- First-article inspection with comprehensive dimensional verification
- In-process checks at critical operational transitions
- Statistical process control for ongoing production
- Final verification using calibrated measurement equipment
For tight-tolerance brass components, we utilize CMM (Coordinate Measuring Machine) technology capable of micron-level measurement precision.
Environmental Controls for Measurement Accuracy
Even perfect machining can be undermined by improper measurement conditions. Critical considerations include:
- Temperature-controlled inspection environments (typically 20°C/68°F)
- Regular calibration of measuring instruments
- Standardized measurement procedures to eliminate operator variation
- Consideration of material temperature stabilization before measurement
Troubleshooting Common Dimensional Issues
When dimensional discrepancies occur in brass parts, systematic analysis identifies root causes. Common issues I’ve encountered include:
- Tool deflection during machining, especially with long reach tools
- Incomplete chip evacuation causing heat buildup
- Inconsistent material properties between batches
- Fixturing that introduces stress and subsequent deformation
By implementing the strategies outlined above, manufacturers can consistently achieve exceptional dimensional accuracy in brass machined components, meeting even the most demanding tolerance requirements for precision applications.
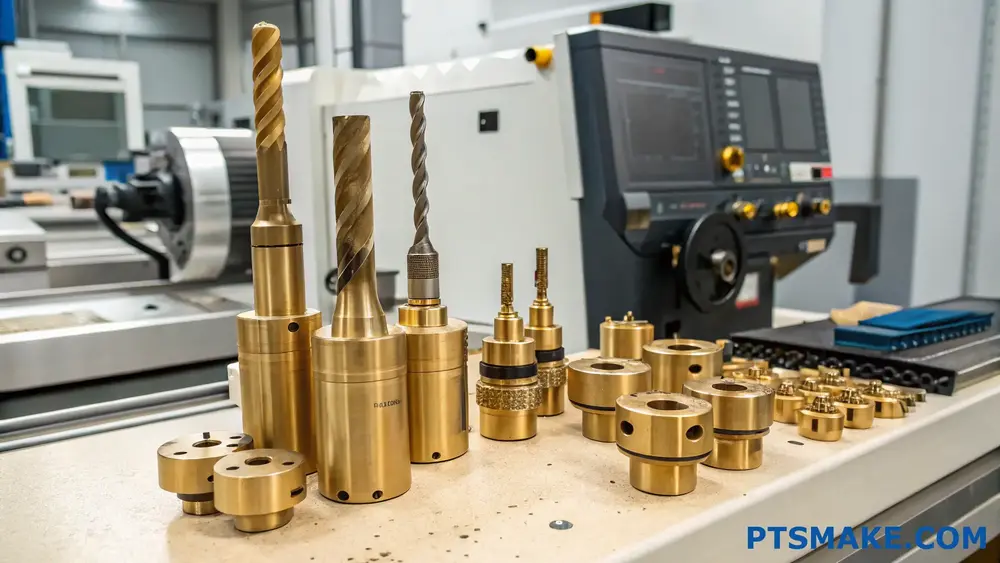
What Are the Best Practices for Maintaining Brass Machining Tools?
Have you ever pulled out your brass machining tools only to find them dull, corroded, or performing poorly? Do you struggle with inconsistent cuts and frequent tool replacements that drain both your time and budget? These frustrations can turn what should be precision work into an expensive headache.
Properly maintaining brass machining tools requires regular cleaning, correct lubrication, proper storage in dry environments, routine inspection for wear, and adherence to manufacturer-specified cutting parameters. Implementing these practices extends tool life, improves machining precision, and reduces overall production costs.
Understanding Brass Properties and Their Impact on Tooling
Brass is an alloy primarily composed of copper and zinc, making it softer than many metals but still capable of causing significant tool wear. When machining brass, tools face unique challenges due to the material’s properties. Brass has excellent machinability but tends to create built-up edge10 on cutting tools during prolonged operations.
In my experience at PTSMAKE, I’ve found that brass’s thermal conductivity plays a crucial role in tool wear. Unlike aluminum, brass doesn’t dissipate heat as efficiently, which can lead to accelerated tool degradation if proper cooling isn’t maintained. The zinc content in brass (typically 5-40%) significantly affects how your tools will perform and wear over time.
Essential Cleaning Protocols for Brass Machining Tools
Regular cleaning is non-negotiable for maintaining brass machining tools. After each use, I recommend following this cleaning sequence:
- Remove loose chips with compressed air
- Wipe tools with a clean, lint-free cloth
- Use appropriate solvents to remove stubborn brass deposits
- Thoroughly dry tools before storage or next use
For tougher brass residue, I’ve found ultrasonic cleaning particularly effective. At PTSMAKE, we use ultrasonic cleaners with specialized solutions that remove brass particles without damaging the tool surface or geometry.
Optimal Lubrication Strategies
Proper lubrication dramatically extends tool life when machining brass. Unlike ferrous materials, brass often benefits from minimal lubrication or even dry machining in some applications.
Recommended Lubricants by Machining Operation
| Operation Type | Recommended Lubricant | Application Method | Notes |
|---|---|---|---|
| Drilling | Light mineral oil | Mist application | Apply sparingly to prevent chip buildup |
| Milling | Synthetic cutting fluid | Flood cooling | Maintains temperature stability |
| Turning | Light oil or dry | Minimal quantity lubrication | Prevents chip welding to tool |
| Tapping | Sulfur-based cutting oil | Direct application | Improves thread finish |
When using lubricants, consistency is key. I’ve observed that irregular lubrication patterns cause uneven tool wear, leading to premature failure and inconsistent machining results.
Storage Best Practices to Prevent Corrosion
Proper storage significantly impacts tool longevity. Brass machining tools should be stored in:
- Climate-controlled environments with humidity below 60%
- Tool cabinets with vapor phase corrosion inhibitors
- Individual protective sleeves or cases
- Organized systems that prevent tools from contacting each other
At PTSMAKE, we store precision tools in dedicated cabinets with silica gel packets that absorb moisture. This simple addition has noticeably extended tool life, especially for carbide tooling used in brass applications.
Regular Inspection and Reconditioning
Implementing a systematic inspection routine prevents unexpected tool failures. I recommend inspecting brass machining tools:
- Before first use of the day
- After completing large production runs
- When changing between brass alloys
- Any time cutting performance changes
Key Inspection Points
- Cutting edge integrity (check for chips or dullness)
- Coating condition (look for peeling or wear)
- Tool geometry (verify angles haven’t changed)
- Runout (ensure consistent rotation)
For reconditioning, consider whether in-house resharpening makes sense for your operation. While convenient, improper resharpening can alter tool geometry and worsen performance. At PTSMAKE, we’ve found that professional reconditioning services often deliver better consistency for critical tools.
Optimizing Cutting Parameters
The right cutting parameters drastically affect tool life when machining brass. I’ve compiled these parameters based on extensive testing:
- Cutting speed: 300-500 SFM for HSS tools; 500-1000 SFM for carbide
- Feed rates: Generally higher than those used for steel
- Depth of cut: Moderate to heavy cuts often perform better than light passes
- Tool geometry: 0-5° rake angles typically work best for most brass alloys
Adjusting these parameters based on specific brass alloys (yellow brass vs. naval brass, for instance) can further optimize tool performance and longevity.
Implementing a Tool Management System
A systematic approach to tool management pays dividends in extended tool life. An effective system should track:
- Tool usage history
- Reconditioning schedule
- Performance metrics by application
- Cost analysis for replacement vs. reconditioning
Digital tool management systems have revolutionized how we track tooling at PTSMAKE. With barcode scanning and usage monitoring, we can predict when tools need maintenance before performance degrades, saving both time and material costs.
Training Operators for Proper Tool Handling
The human factor remains crucial in tool maintenance. Ensure operators understand:
- Proper tool mounting techniques
- Signs of tool wear specific to brass machining
- Appropriate handling to prevent damage
- When to report tool performance issues
In my experience, investing in operator training yields some of the highest returns when it comes to extending tool life and maintaining machining precision.
A feature that helps break metal chips into manageable pieces during cutting operations. ↩
Learn how chip characteristics affect machining efficiency and tool selection. ↩
Click for essential information about how tool edge condition affects brass machining. ↩
Learn about heat effects on metal crystalline structures and prevent brass discoloration issues. ↩
Understanding material structure changes critical for avoiding component failure. ↩
Learn specific techniques to improve chip control in precision machining applications. ↩
Learn about chip formation mechanics to master brass machining. ↩
Learn precision manufacturing cost-saving techniques from industry experts ↩
Click to learn about this crucial property that affects precision machining outcomes. ↩
Learn how this phenomenon affects your machining quality and tool life. ↩