What Are LED Aluminum Profiles and Why They Matter
Ever admired those sleek, modern lighting setups using LED strips and wondered how they achieve that clean look and impressive longevity? Often, the secret isn’t just the LED strip itself, but the channel it sits in. Let’s explore these essential components.
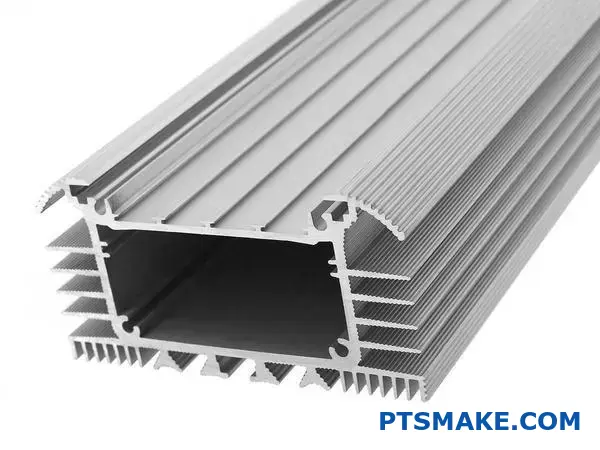
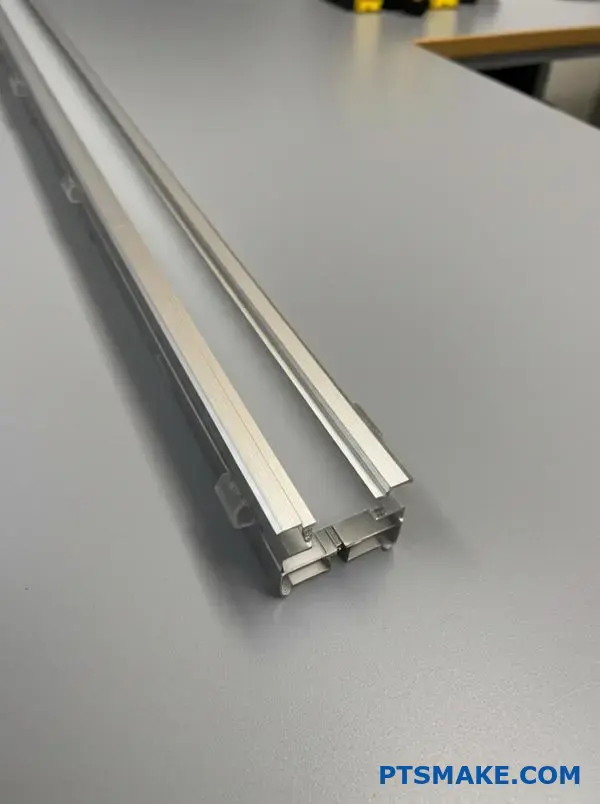
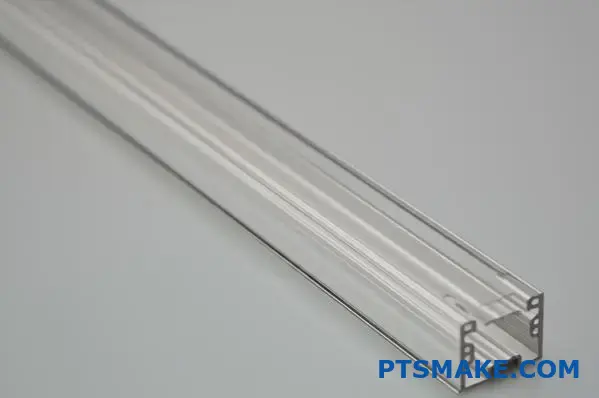
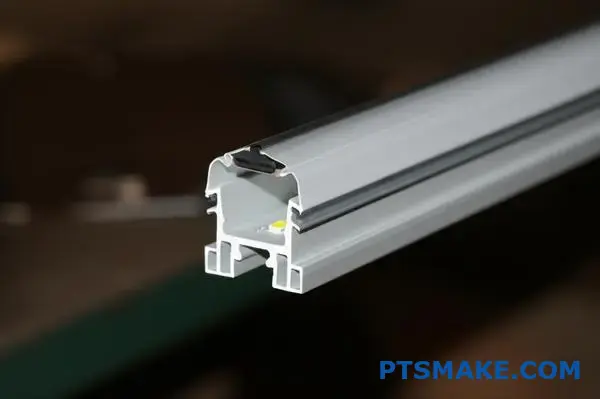
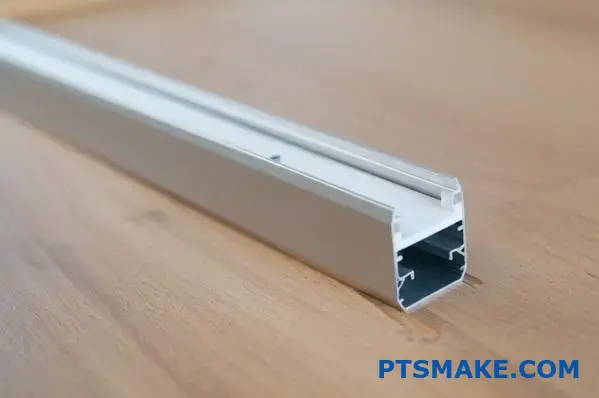
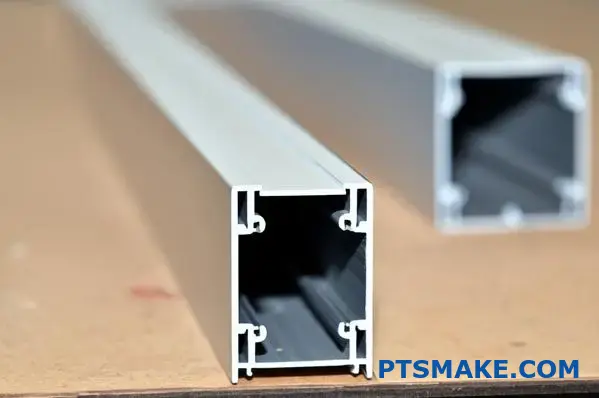
LED Aluminum Profiles, also known as LED extrusions or channels, are housings specifically designed for LED strip lights. They serve critical functions: protecting the fragile LED strips, acting as a heat sink to manage temperature, and providing a finished, professional appearance for lighting installations.
Let’s dive deeper into why these profiles are more than just simple channels. Understanding their function is key, especially if you’re involved in product design or manufacturing where lighting integration is important. Based on past projects at PTSMAKE, integrating lighting effectively often hinges on selecting the right housing.
The Core Functions of LED Aluminum Profiles
Think of LED Aluminium Profiles as having three primary jobs: protection, thermal management, and light diffusion/aesthetic enhancement. Each plays a vital role in the overall performance and longevity of an LED lighting system.
Protection: Shielding Your Investment
LED strips, while versatile, are relatively delicate. The tiny diodes and circuitry are susceptible to various environmental factors.
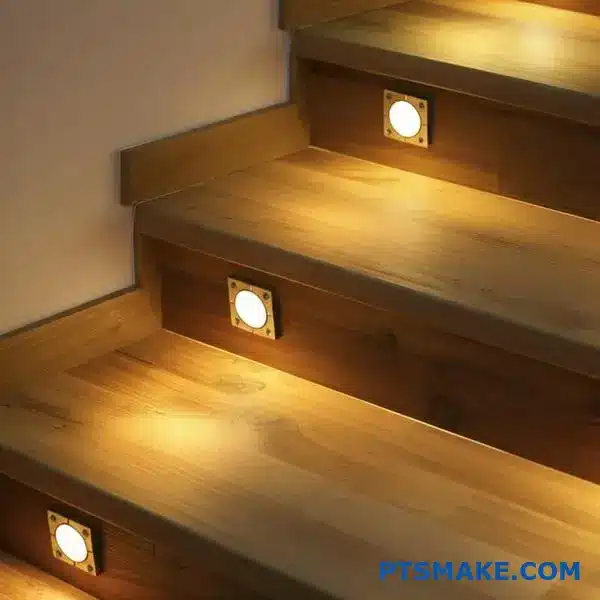
- Physical Damage: Exposed LED strips can be easily damaged by accidental bumps, nicks, or pressure. An aluminum profile provides a rigid enclosure, safeguarding the strip, particularly in high-traffic areas or accessible locations like under cabinets or along stairways.
- Dust and Debris: Over time, dust accumulation can cover the LEDs, potentially reducing light output and, in some cases, acting as an insulator, trapping heat. Profiles, especially when paired with a diffuser cover, create a barrier against dust.
- Moisture: While standard profiles aren’t fully waterproof, they offer a degree of protection against occasional splashes or humidity, especially when installed with appropriate end caps and sealing. For specific needs, IP-rated profiles are available. This protective function directly contributes to the reliability and lifespan of the lighting installation.
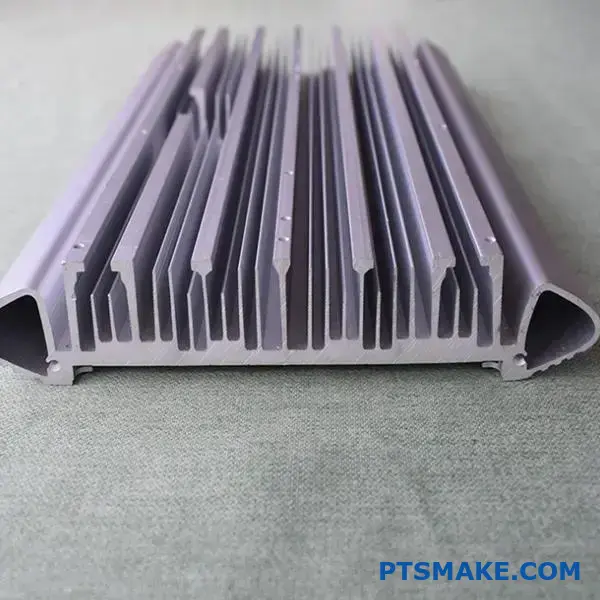
Thermal Management: Why Heat Sinks are Crucial
This is perhaps the most critical, yet often overlooked, function. LEDs generate heat during operation. While significantly less than traditional incandescent bulbs, this heat needs to be dissipated effectively.
- Heat and LED Lifespan: Excessive heat is the enemy of LEDs. It accelerates Lumen Depreciation1, which is the gradual decrease in light output over time. High temperatures can also cause color shifting, where the perceived color of the light changes, compromising the intended lighting effect.
- Aluminum’s Role: Aluminum is an excellent thermal conductor. The profile acts as a heat sink, drawing heat away from the LED strip and dissipating it into the surrounding air. This passive cooling mechanism is vital for maintaining the LED’s performance, brightness, and expected lifespan. Without adequate heat sinking, LED strips can fail prematurely. In our testing comparing LEDs with and without proper profiles, the difference in operating temperature and sustained brightness is significant.
Enhancing Light Quality: Diffusion and Aesthetics
Beyond protection and cooling, LED Aluminium Profiles significantly impact the visual outcome.
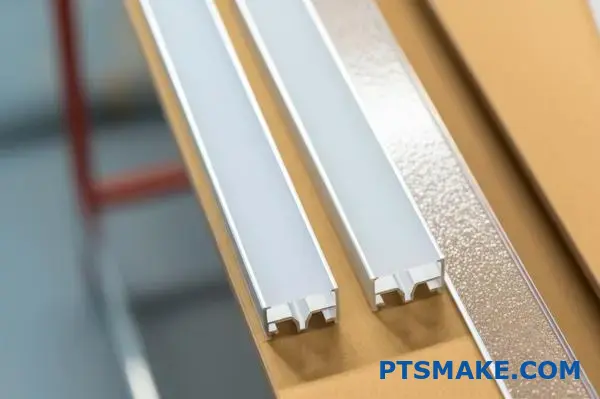
- Diffusers/Covers: Most profiles come with or can be fitted with a cover (diffuser), typically made of polycarbonate (PC) or polymethyl methacrylate (PMMA). These come in various finishes:
- Clear: Offers maximum light output but keeps individual LED diodes visible (can create spotting).
- Frosted/Satin: Provides moderate diffusion, softening the light and slightly obscuring the diodes.
- Opal/Milky: Offers the best diffusion, creating a smooth, uniform line of light with minimal spotting, though it reduces total light output slightly more than frosted.
- Professional Finish: Profiles conceal the LED strip, wiring, and mounting hardware, resulting in a clean, integrated, and professional look. Exposed LED strips can look unfinished or temporary. Profiles elevate the installation, making it suitable for high-end residential, commercial, and architectural applications.
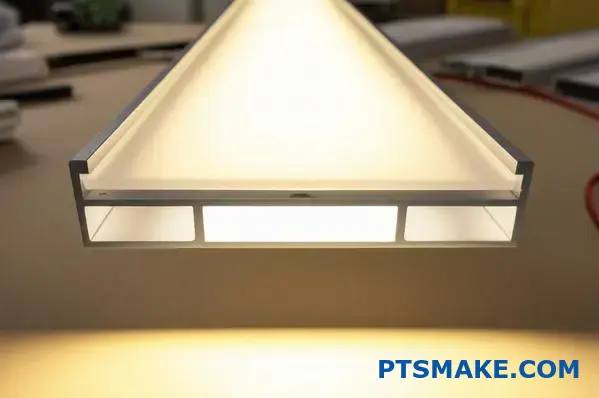
- Directing Light: The shape of the profile and the placement of the LED strip within it can help direct light. For example, corner profiles are designed to cast light outwards at a 45-degree angle, perfect for display cases or cove lighting.
Material and Design Considerations
The choice of material and profile design influences performance and application suitability.
Why Aluminum?
Aluminum is the go-to material for LED profiles for several compelling reasons:
- التوصيل الحراري: As mentioned, it excels at dissipating heat.
- Lightweight: Aluminum is light yet strong, making installation easier and reducing structural load.
- Durability & Corrosion Resistance: It naturally forms a protective oxide layer, resisting corrosion. Anodizing or powder coating can further enhance durability and provide color options.
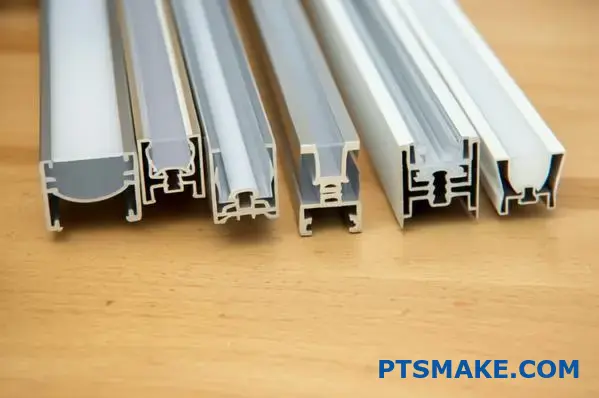
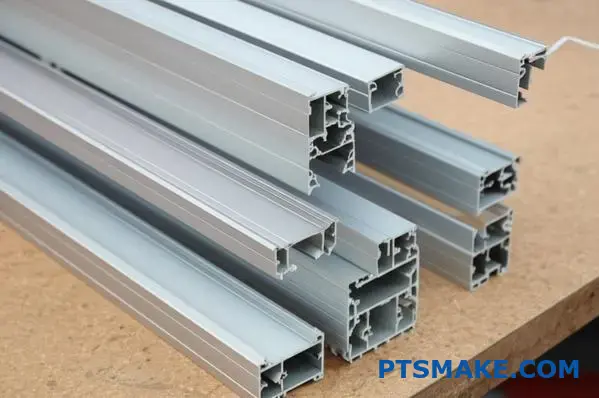
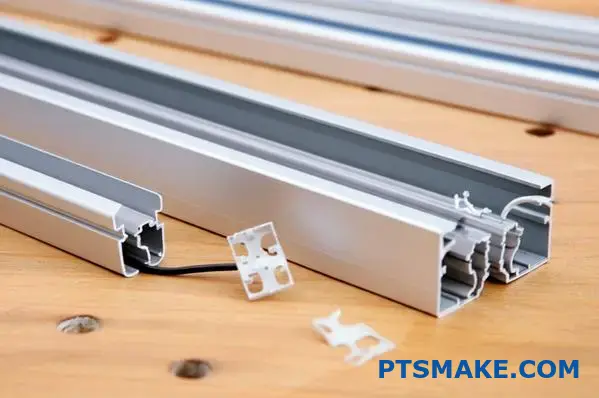
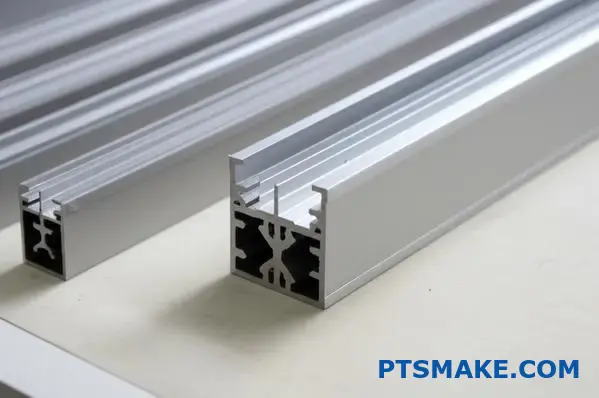
- Workability: Aluminum is easily extruded into complex shapes and can be readily cut, drilled, or machined. This allows for a vast array of profile designs and facilitates customization – something we handle frequently at PTSMAKE when precise lengths or mounting modifications are needed for specific projects. While we don’t extrude in-house, our precision machining ensures perfect fits and finishes for associated components or custom end caps.
Profile Types and Applications
Different projects call for different profile shapes and mounting styles. Here’s a quick overview:
| نوع الملف الشخصي | الوصف | التطبيقات الشائعة |
|---|---|---|
| Surface Mount | Mounts directly onto a flat surface. | Under cabinets, shelves, general task lighting |
| Recessed | Installed into a routed groove for a flush finish. | Walls, ceilings, furniture integration, architectural |
| Corner Mount | Fits into 90-degree corners, directs light at 45°. | Display cases, cove lighting, accent lighting |
| Pendant/Suspended | Hung from ceilings using suspension kits. | Office lighting, modern residential, linear fixtures |
| Angled Mount | Surface mounted but directs light at an angle. | Wardrobes, under-shelf lighting, focused task light |
This table isn’t exhaustive, as many specialized profiles exist (e.g., for flooring, stairs, wardrobes), but it covers the most common types encountered in various lighting designs.
Customization Possibilities
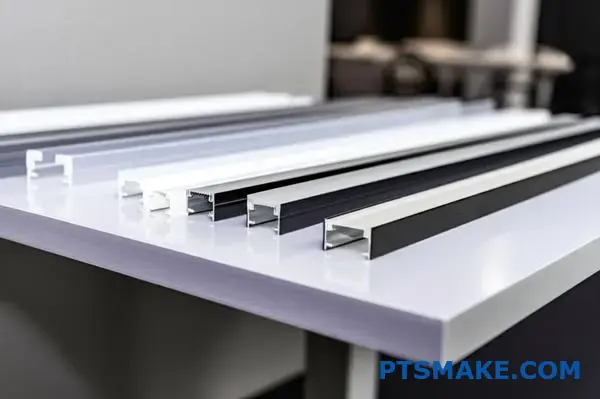
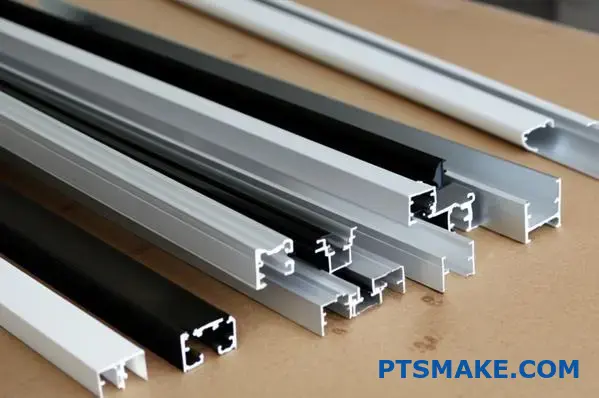
Standard lengths (usually 1m, 2m, or 3m) are common, but profiles can typically be cut to precise lengths using appropriate tools. Furthermore, the finish can often be customized. Standard is usually a satin anodized aluminum finish, but options like black, white, or other powder-coated colors are available. For unique projects demanding specific dimensions or integrated features, exploring custom extrusion or precision modification of standard profiles is possible, ensuring the lighting perfectly integrates with the overall design.
Understanding these functions and considerations helps in selecting the right LED Aluminium Profile, ensuring not just aesthetic appeal but also optimal performance and longevity for any LED strip lighting project.
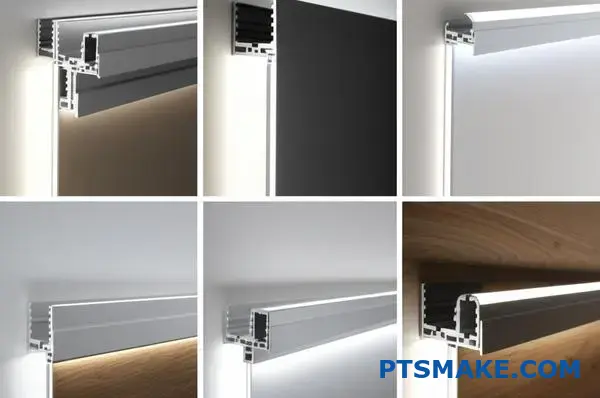
Types of LED Aluminium Profiles for Different Applications
Choosing the right LED strip is only half the battle; the profile you house it in dramatically impacts the final look and installation process. Ever wondered why some LED installations look seamlessly integrated while others are more surface-level? Let’s explore the different types.
LED Aluminium Profiles come in various designs like surface mount, recessed, trimless, suspended, and corner types. Each profile is engineered for specific mounting requirements and aesthetic goals, fundamentally shaping how the light interacts with the space and how the fixture integrates into the environment.

The world of LED Aluminium Profiles offers diverse solutions tailored to almost any lighting challenge. Understanding the core types helps you select the best fit for your project, whether it’s for functionality, aesthetics, or a combination of both. At PTSMAKE, while we focus on precision components and manufacturing services like CNC machining and injection molding, we often collaborate with clients integrating lighting, so understanding these profiles is crucial for designing associated parts or enclosures. Let’s break down the main categories.
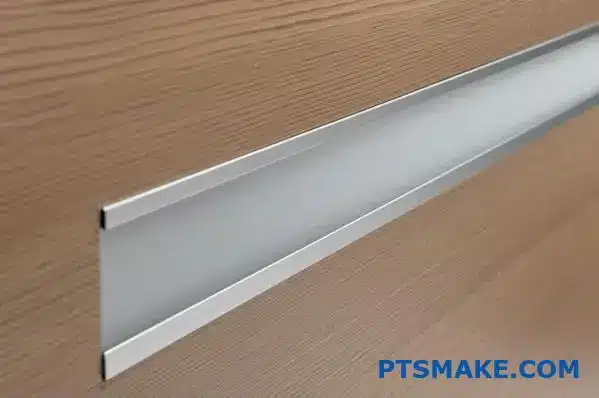
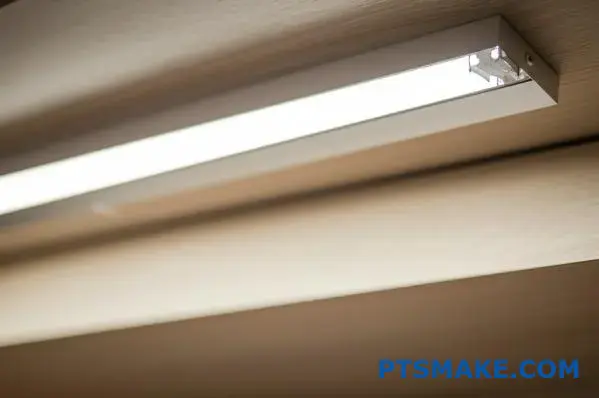
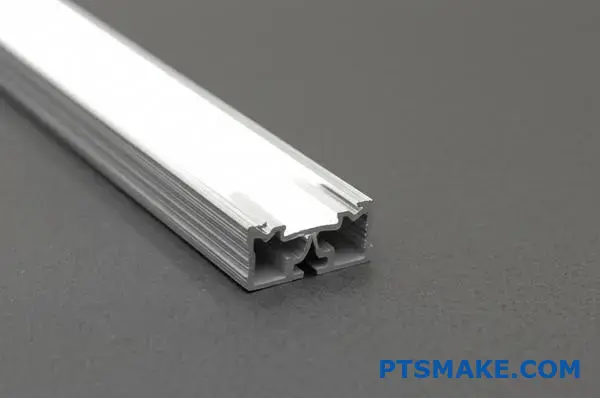
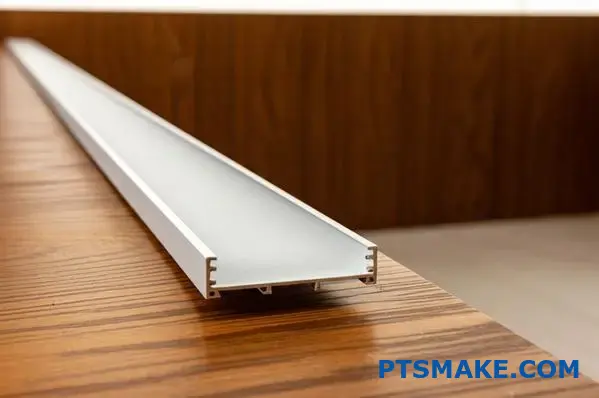
Surface Mount Profiles
This is often the most straightforward type of LED Aluminium Profile. As the name suggests, these profiles are designed to be mounted directly onto a flat surface using mounting clips, screws, or adhesive tape.
Installation and Appearance
Installation is generally simple. You fix the clips or apply tape to the surface, then snap the profile into place. The profile itself remains visible, sitting proud of the mounting surface. While not as integrated as recessed options, they offer a clean, finished look compared to bare LED strips, hiding the strip and diffusing the light.
التطبيقات الشائعة
Surface mount profiles are incredibly versatile. You’ll find them commonly used for:
- Under-cabinet lighting in kitchens.
- Inside wardrobes or closets.
- Task lighting above workbenches.
- Accent lighting along shelves or display units.
- General linear lighting where cutting into the surface isn’t feasible or desired.
They provide effective heat sinking and protection with minimal installation complexity. The choice of diffuser (clear, frosted, opal) allows control over the light output, from bright and direct to soft and even.
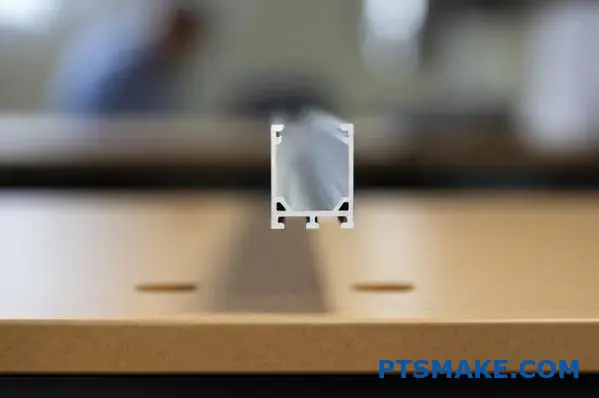
Recessed Profiles
For a truly integrated look, recessed profiles are the way to go. These are designed to sit flush within a groove or channel cut into the mounting surface (like drywall, wood panels, or furniture).
Installation and Appearance
Installation is more involved than surface mounting. It requires precise cutting of a channel to match the profile’s dimensions. Once the channel is ready, the profile is inserted, often secured with adhesive or small side springs/clips. The result is a sleek, low-profile appearance where only the diffuser and potentially thin flanges (edges) of the profile are visible.
Achieving the Flush Look
The key challenge here is the precision of the cut. An uneven or oversized groove can lead to gaps or an unprofessional finish. This is where planning and careful execution are vital. Based on projects we’ve supported at PTSMAKE, providing precise dimensions and sometimes even assisting with jig design for routing can make a significant difference for installers aiming for perfection.
التطبيقات الشائعة
Recessed profiles are ideal for:
- Architectural lighting integrated into walls or ceilings.
- Creating clean lines of light in modern furniture design.
- Floor or stair lighting (using profiles specifically rated for foot traffic).
- Seamless joinery lighting.
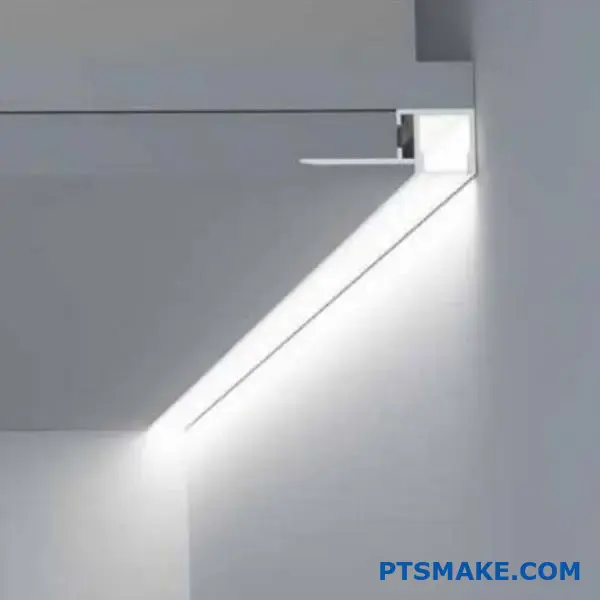
Trimless Mud-In Profiles
Taking the integrated look a step further, trimless (or "mud-in") profiles are a specialized type of recessed profile designed to be completely seamless with the surrounding surface, typically drywall.
Installation and Appearance
These profiles have perforated flanges or edges designed to be covered with plaster or joint compound ("mud"). After installation, the profile itself is invisible, leaving only the light-emitting diffuser visible as a clean line of light seemingly emerging directly from the wall or ceiling. Achieving this look requires careful plastering and finishing work.
التطبيقات الشائعة
Trimless profiles are favoured in high-end architectural and interior design projects where a minimalist aesthetic is paramount. They are used for:
- Creating striking lines of light in ceilings and walls.
- Framing architectural features.
- Integrating light seamlessly into minimalist designs.
The installation demands skill and coordination between the electrical and finishing trades but results in a sophisticated, built-in appearance.
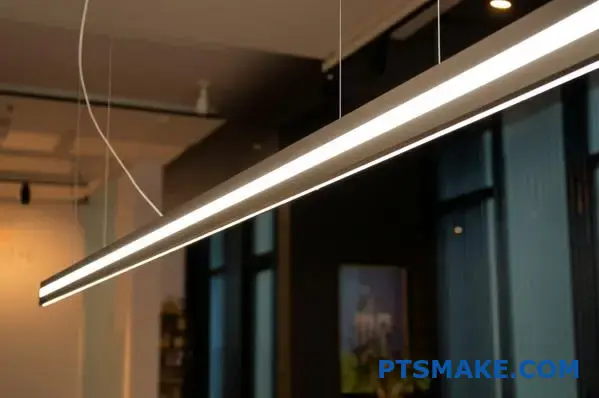
Suspended (Pendant) Profiles
Suspended profiles, also known as pendant profiles, are designed to hang from the ceiling using suspension kits, typically consisting of steel wires.
مرونة التصميم
These profiles offer significant design freedom. They can be hung at various heights and configured into different shapes or long linear runs. Many suspended profiles are designed to provide both direct (downward) and indirect (upward) lighting, creating balanced illumination. The profiles themselves are often larger to accommodate power supplies or multiple LED strips. The process of creating these profiles often involves aluminium البثق2, allowing for complex shapes suitable for suspension and housing components.
التطبيقات الشائعة
Suspended profiles are popular in:
- Office lighting over desks or meeting tables.
- Modern residential lighting, especially over kitchen islands or dining tables.
- Commercial spaces like retail stores or galleries.
- Creating decorative linear fixtures.
Considerations include ensuring secure ceiling anchor points and managing the power cabling aesthetically.
Corner Profiles
Specifically designed to fit into 90-degree corners, these profiles typically have an angled shape (often 45 degrees) that directs the light outwards from the corner.
Installation and Effect
They can be surface mounted or sometimes recessed into corners. The angled design is perfect for projecting light evenly across two adjacent surfaces or focusing light out from a corner location. Installation usually involves screws or mounting clips designed for corner placement.
التطبيقات الشائعة
Corner profiles excel in:
- Display case and cabinet lighting.
- Cove lighting along wall-ceiling junctions.
- Under-shelf accent lighting.
- Task lighting in corner workstations.
They efficiently utilize corner spaces that might otherwise be difficult to illuminate effectively.
Choosing the Right Profile: A Summary
Selecting the best LED Aluminium Profile depends heavily on the specific application, the desired aesthetic, and installation constraints. Here’s a quick comparison:
| نوع الملف الشخصي | Installation Difficulty | Aesthetic Result | Typical Use Cases | الميزة الرئيسية |
|---|---|---|---|---|
| Surface Mount | منخفضة | Visible, Clean | Under cabinets, shelves, general purpose | Simplicity, Versatility |
| Recessed | متوسط | Flush, Integrated | Walls, ceilings, furniture, architectural integration | Seamless Look |
| Trimless | عالية | Completely Seamless | High-end architectural, minimalist designs | Invisible Fixture |
| Suspended | متوسط | Feature Fixture | Offices, dining areas, decorative linear lighting | Design Flexibility, Dual Lighting |
| Corner | منخفضة-متوسطة | Fits Corners, Directional | Display cases, coves, corner task/accent lighting | Efficient Use of Corners |
Understanding these core types empowers you to make informed decisions, ensuring your LED strip lighting not only performs well but also looks precisely the way you envisioned. Each type offers unique advantages, transforming a simple LED strip into a sophisticated lighting element.
Installation Methods for Optimal Performance
Ever installed LED strips only to have them look unprofessional or fail prematurely? The secret often lies not just in the LED Aluminium Profile itself, but in كيف it’s installed. Let’s explore the techniques that guarantee a perfect, long-lasting result.
Proper installation techniques for LED Aluminium Profiles are vital for performance. Correct mounting on surfaces like walls, ceilings, or furniture ensures secure fitting, maximizes heat dissipation for LED longevity, and provides consistent, optimal light output, preventing common failures and aesthetic issues.
Getting the installation right transforms a simple lighting concept into a polished, reliable feature. It’s about more than just sticking something to a surface; it involves preparation, understanding the surface, and using the right techniques to ensure both aesthetics and function are top-notch. In past projects at PTSMAKE, we’ve seen how even the best components can underperform if installation isn’t handled correctly, which is why understanding these methods is valuable for designers and engineers like our typical readers.
Preparing for a Flawless Installation
Before you even touch the profile, a bit of planning goes a long way. Rushing this stage often leads to mistakes later on.
Assessing the Surface
First, carefully examine the surface where the profile will be mounted. Is it drywall, plaster, wood, tile, concrete, or metal? Each material has different properties affecting how you’ll mount the profile.
- Drywall/Plaster: Relatively easy to work with but may require specific anchors for secure mounting, especially for heavier profiles or ceiling installations. Cutting is necessary for recessed types.
- Wood/Furniture: Generally easy to drill or route. Need to consider wood grain and finish. Adhesives bond well, but screws offer more permanence.
- Tile/Concrete: Requires specialized drill bits and potentially more robust anchoring methods. Surface mounting is often easier than attempting recessed installation.
- Metal: Drilling and tapping might be needed, or strong adhesives suitable for metal surfaces.
Also, check if the surface is flat and clean. Uneven surfaces can prevent the profile from sitting flush, affecting both appearance and heat dissipation. Clean surfaces ensure better adhesion for tapes or mounting compounds.
Tools and Layout
Gather the necessary tools: measuring tape, level, pencil, drill (with appropriate bits), saw (fine-toothed, suitable for aluminum), mounting clips or screws, adhesive tape (if applicable), and safety gear.
Plan the exact layout. Mark the path for the profile clearly. Use a level to ensure straight lines, especially for longer runs. Decide on the entry and exit points for wiring before you start mounting.
Mounting Techniques for Different Surfaces
The chosen mounting method depends heavily on the profile type (surface, recessed, corner) and the surface material.
Walls (Drywall/Plaster)
- Surface Mount: The easiest option. Mark your line, drill pilot holes for mounting clips (use appropriate drywall anchors if not hitting a stud), screw the clips in place, and snap the profile onto the clips. Alternatively, use high-bond double-sided tape for lighter profiles, ensuring the wall surface is clean and smooth.
- Recessed Mount: Requires precision cutting. Mark the channel dimensions accurately. Use a router or oscillating multi-tool to create the groove. Test fit the profile. Secure it using construction adhesive applied within the groove or use the profile’s built-in spring clips if available. For trimless profiles, you’ll need to carefully apply plaster or mud over the flanges and sand for a seamless finish.
Ceilings
Mounting on ceilings follows similar principles to walls but requires extra care regarding weight and secure anchoring. Always use anchors suitable for ceiling loads if not screwing directly into joists. For suspended profiles, ensure the suspension kit anchors are rated for the profile’s weight and are installed into a secure structural element.
Stairs
Safety and durability are paramount here.
- Specialized Stair Nosing Profiles: These are designed to fit onto the edge of a stair tread, often incorporating anti-slip features alongside the light channel. They provide both illumination and safety.
- Surface/Recessed on Risers or Sides: Mounting profiles on the vertical riser or along the side stringer can create effective accent lighting. Use robust mounting methods (screws preferred over tape) due to potential foot traffic and vibration. Ensure profiles are low-profile to avoid becoming trip hazards.
Furniture (Wood/Laminate/Cabinets)
- Surface Mount: Often used under cabinets or inside shelves. Clips or high-quality adhesive tape work well. Pre-drill small pilot holes if using screws to prevent wood splitting.
- Recessed Mount: Routing a channel in wood provides a very clean, integrated look. This requires a router and careful measurement. Adhesive within the routed channel usually suffices for securing the profile. Planning wire routes within the furniture piece is crucial during the design phase.
Ensuring Optimal Performance Post-Installation
Correct mounting is just the start. You also need to ensure the setup delivers the best light and lasts as long as possible.
Maximizing Light Output
- Diffuser Choice: Remember that opal diffusers provide the smoothest light but reduce total output more than frosted or clear ones. Choose based on the desired effect versus brightness needs.
- Cleanliness: Ensure the diffuser and LED strip are clean before final assembly. Dust or fingerprints can affect light quality.
- Avoid Obstructions: Make sure the profile’s light path isn’t unintentionally blocked by mounting hardware or poorly routed wires.
Effective Heat Dissipation
This is critical for LED lifespan. The aluminium profile acts as a heat sink, but only if there’s good thermal contact.
- Strip Adhesion: Ensure the LED strip’s adhesive backing makes firm, continuous contact with the profile’s inner surface. Avoid air gaps.
- Airflow: While profiles help dissipate heat, avoid installing them in completely sealed, unventilated spaces if possible, especially with high-power LED strips. Some airflow around the profile aids cooling.
- Thermal Interface: For high-performance applications, ensuring optimal heat transfer from the LED strip PCB to the aluminium profile is key. Sometimes, a thin layer of مادة الواجهة الحرارية3 (TIM) can improve this, although most LED strips rely on their adhesive backing. Poor heat transfer leads to higher operating temperatures, reducing LED lifespan and potentially causing color shifts. Our tests confirm that properly installed profiles significantly lower LED operating temperatures compared to bare strips.
Common Installation Pitfalls (and Solutions)
Even experienced installers can encounter issues. Here are a few common ones:
| Pitfall | المشكلة | الحل |
|---|---|---|
| Poor Alignment | Profiles look crooked or uneven, gaps between sections. | Use a level, mark lines carefully, use alignment connectors for long runs. |
| Incorrect Cutting | Ragged edges, incorrect length, damaged diffuser. | Use a fine-toothed saw suitable for aluminum, measure twice, cut once, deburr edges. Cut diffusers carefully. |
| Visible Wires | Untidy appearance, potential hazard. | Plan wire routes in advance, drill access holes discreetly, use raceways or embed wires where possible. |
| LED Strip Damage | Bending strip too sharply, puncturing during installation. | Handle strips carefully, respect minimum bend radius, avoid excessive force when inserting into profile. |
| Insecure Mounting | Profile detaches or sags over time. | Use appropriate anchors/screws for the surface weight, ensure sufficient mounting points/clips. |
| Poor Heat Contact | LED strip overheats and fails prematurely. | Clean profile interior, press strip firmly, ensure good adhesive contact along the entire length. |
Avoiding these pitfalls comes down to careful planning and execution. For our clients at PTSMAKE needing precision components related to lighting fixtures, ensuring the installation process is considered during the design phase often leads to better overall product performance and user satisfaction. Taking the time to install LED Aluminium Profiles correctly ensures they not only look great but perform reliably for years to come.
Selecting the Right Diffuser for Your Project
Ever noticed how some LED strip lights look like elegant, smooth lines of light, while others show distracting bright dots? The secret often lies in a small but crucial component: the diffuser. Choosing the right one is key to achieving the perfect lighting effect for your project.
Selecting the right diffuser for your LED Aluminium Profiles—typically choosing between clear, frosted, or opal options—is crucial for controlling light distribution, eliminating visible LED hotspots, and achieving the desired aesthetic, from maximum brightness to a seamless, uniform glow.
The diffuser, or cover, is the translucent piece that snaps or slides into the LED Aluminium Profile, sitting between the LED strip and the outside world. It might seem like a simple piece of plastic, but its impact on the final lighting outcome is significant. It’s not just about protecting the LEDs; it fundamentally shapes the light. Let’s break down the common options and how to choose the best one for your needs.
Understanding the Main Diffuser Types
Most diffusers for LED Aluminium Profiles fall into three main categories: clear, frosted, and opal (or milky). Each offers a different balance between light transmission and light diffusion.
Clear Diffusers
As the name suggests, clear diffusers are completely transparent.
- Light Transmission: They allow the maximum amount of light from the LED strip to pass through, typically transmitting over 90-95% of the lumens.
- Diffusion: Minimal diffusion occurs. The individual LED diodes (the "dots" or "hotspots") remain clearly visible.
- Protection: They offer excellent protection for the LED strip against dust, physical touch, and minor impacts without significantly altering the light output quality.
- Best Use Cases: Clear diffusers are ideal when maximizing brightness is the absolute priority, and the visibility of individual LEDs is not a concern or is desired for a specific effect. Think task lighting where intensity matters most, or situations where the light source itself is hidden from direct view (e.g., deep inside a cove).
Frosted Diffusers
Frosted diffusers have a slightly textured or sandblasted appearance, offering a middle ground.
- Light Transmission: They transmit slightly less light than clear diffusers, usually around 70-85%, depending on the level of frosting.
- Diffusion: They provide moderate diffusion, softening the light and partially obscuring the individual LED diodes. Hotspots are less pronounced but may still be noticeable, especially with lower-density LED strips or shallow profiles.
- الجماليات: They offer a good balance between brightness and smoothness, providing a more finished look than clear diffusers without significantly sacrificing light output.
- Best Use Cases: Frosted diffusers are a popular all-around choice. They work well for under-cabinet lighting, general ambient lighting, and display cases where some diffusion is desired, but high brightness is still important.
Opal (Milky) Diffusers
Opal diffusers have a milky white appearance and provide the highest level of diffusion.
- Light Transmission: They have the lowest light transmission rate, often ranging from 50% to 70%. This means a noticeable reduction in overall brightness compared to clear or frosted options.
- Diffusion: Excellent diffusion capabilities. They spread the light very evenly, effectively eliminating hotspots and creating a smooth, uniform line of light, provided the profile depth and LED density are adequate.
- الجماليات: Opal diffusers deliver the most professional and high-end look, resembling a seamless fluorescent tube or a built-in architectural light source.
- Best Use Cases: Ideal for visible installations where a perfectly smooth, dot-free appearance is essential. This includes architectural lighting, accent lighting where the fixture is directly viewed, light lines in walls or ceilings, and high-end furniture integration. The trade-off is the reduction in brightness, which might require using a brighter LED strip initially.
Factors Influencing the Final Look
Choosing between clear, frosted, and opal isn’t the only consideration. Two other factors play a crucial role in how well hotspots are eliminated, especially when using frosted or opal diffusers:
عمق الملف الشخصي
The distance between the LED strip and the diffuser matters significantly. Deeper profiles allow the light more space to spread out before hitting the diffuser, resulting in better diffusion and fewer visible hotspots. A shallow profile, even with an opal diffuser, might still show some spotting if the LEDs are very close to the surface. When we work with clients at PTSMAKE on custom enclosures involving lighting, considering this depth is key to achieving the desired uniformity.
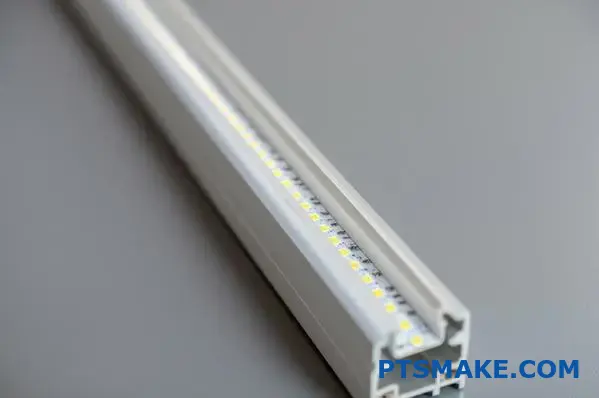
LED Strip Density
The number of LEDs per meter (or foot) on the strip also impacts hotspot visibility. Higher density strips (e.g., 120 LEDs/m or more) naturally create a more continuous line of light, making it easier for frosted or opal diffusers to blend the light smoothly. Lower density strips (e.g., 30 or 60 LEDs/m) have larger gaps between diodes, making hotspots more challenging to eliminate completely, often requiring a deeper profile and an opal diffuser.
Comparing Diffuser Options
Here’s a quick comparison table to help you decide:
| الميزة | Clear Diffuser | Frosted Diffuser | Opal (Milky) Diffuser |
|---|---|---|---|
| انتقال الضوء | Highest (>90%) | Medium (70-85%) | Lowest (50-70%) |
| Diffusion Level | منخفضة جداً | متوسط | عالية |
| Hotspot Visibility | عالية جداً | مخفضة | Minimal / None* |
| الميزة الأساسية | Max Brightness | Balanced Look | Smooth, Dot-Free Look |
| Main Drawback | Visible Dots | Potential Spots | Reduced Brightness |
| الاستخدام الشائع | Task, Hidden Light | General, Cabinets | Architectural, Visible |
*Hotspot elimination with Opal depends on profile depth and LED density.
Material Matters: PC vs. PMMA
Diffusers are typically made from either Polycarbonate (PC) or Polymethyl Methacrylate (PMMA), also known as acrylic.
- PC (Polycarbonate): More impact-resistant and flexible than PMMA. It’s generally tougher and less likely to crack during installation or if bumped. However, it might be slightly less UV resistant than PMMA over the long term unless specifically treated. Its flexibility often makes snap-in installation easier.
- PMMA (Acrylic): Offers excellent optical clarity and UV resistance, making it less prone to yellowing over time, especially outdoors. However, it’s more brittle than PC and can crack more easily if mishandled or subjected to impact.
The choice between PC and PMMA often comes down to the specific application environment (indoor vs. outdoor, risk of impact) and the manufacturer’s specifications. Understanding these material properties is crucial, especially in custom projects, something we frequently address at PTSMAKE when discussing specifications for injection molded components that might interact with lighting elements. Understanding the Refractive Index4 of these materials also helps predict how light will bend and diffuse.
Ultimately, selecting the right diffuser involves balancing your need for brightness against the desire for a smooth, uniform appearance, while also considering the profile depth and LED strip you’re using. By understanding these options, you can ensure your LED Aluminium Profile installation delivers the perfect visual effect for your project.
Waterproof Solutions for Outdoor and Wet Areas
Taking your stunning LED lighting designs outdoors or into wet areas like bathrooms and kitchens presents unique challenges. How do you ensure longevity and safety when moisture, dust, and changing temperatures are constant threats? Let’s explore the specialized solutions available.
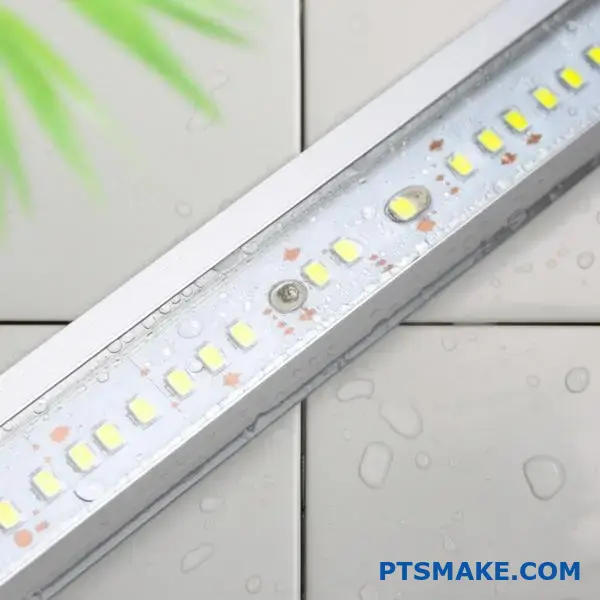
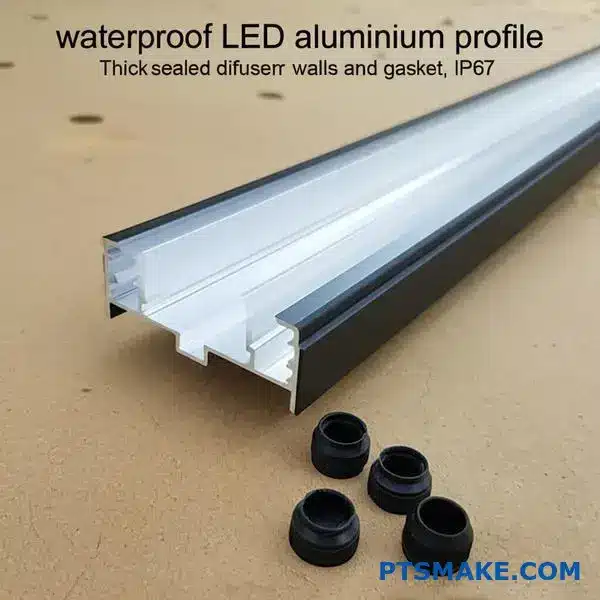
Specialized LED Aluminium Profiles offer waterproof and dustproof protection through specific designs and sealing methods, often indicated by an Ingress Protection (IP) rating. These profiles are essential for ensuring the safety, durability, and performance of LED strip lights in bathrooms, kitchens, pool areas, and exterior applications.
Using standard LED Aluminium Profiles in damp or outdoor environments is often asking for trouble. Moisture ingress can lead to short circuits, corrosion, and premature failure of the LED strip, creating potential safety hazards. Fortunately, the industry has developed robust solutions specifically designed to withstand these harsher conditions. Understanding these options is crucial, especially when specifying components for projects where reliability is non-negotiable – a common concern for engineers like Matthew Shekels focused on product durability.
Understanding IP Ratings: Decoding Waterproof Protection
The key indicator for a profile’s suitability for wet or dusty areas is its IP rating. IP stands for Ingress Protection5, and the rating consists of two digits.
The First Digit: Solids Protection
This number indicates the level of protection against the ingress of solid foreign objects, ranging from large body parts (low numbers) to fine dust (high numbers).
- IP5X: Dust Protected. Ingress of dust is not entirely prevented, but it must not enter in sufficient quantity to interfere with the satisfactory operation of the equipment.
- IP6X: Dust Tight. No ingress of dust; complete protection against contact.
The Second Digit: Liquids Protection
This number indicates the level of protection against the ingress of water with harmful effects. This is usually the critical factor for outdoor and wet area applications.
- IPX4: Splashing Water. Water splashing against the enclosure from any direction shall have no harmful effect.
- IPX5: Water Jets. Water projected by a nozzle (6.3mm) against enclosure from any direction shall have no harmful effects.
- IPX7: Immersion up to 1m. Ingress of water in harmful quantity shall not be possible when the enclosure is immersed in water under defined conditions of pressure and time (up to 1 m of submersion for 30 minutes).
- IPX8: Immersion beyond 1m. The equipment is suitable for continuous immersion in water under conditions specified by the manufacturer. Often, this means the equipment is hermetically sealed.
Common IP Ratings for LED Profiles
Based on these digits, here are some common IP ratings you’ll encounter for waterproof LED Aluminium Profiles and their typical suitability:
| IP Rating | Solids Protection | Liquids Protection | التطبيقات الشائعة |
|---|---|---|---|
| IP65 | Dust Tight | Water Jets (e.g., hose down) | Kitchens, bathrooms (away from direct shower), workshops |
| IP67 | Dust Tight | Immersion up to 1m (temporary) | Outdoor walkways, decks, pool areas (splash zones) |
| IP68 | Dust Tight | Continuous Immersion (manufacturer defined) | Underwater lighting (pools, fountains), very wet areas |
It’s vital to select a profile with an IP rating appropriate for the specific environmental challenges it will face. Over-specifying can add unnecessary cost, while under-specifying leads to failure.
How Waterproof LED Aluminium Profiles Achieve Sealing
Achieving a high IP rating isn’t just about the profile shape; it involves a system approach incorporating several key elements:
Sealed Diffusers and End Caps
The diffuser and end caps are critical points for potential water ingress. Waterproof profiles utilize:
- Gasket Seals: High-quality rubber or silicone gaskets are fitted within the channels where the diffuser snaps or slides in, creating a watertight seal.
- Sealed End Caps: End caps are designed with integrated gaskets or require silicone sealant application during installation to prevent water entry at the profile ends. Cable entry points often use compression glands for a watertight feed-through.
Profile Construction and Materials
- Robust Design: Profiles intended for IP ratings are often built with thicker walls and secure locking mechanisms for the diffuser.
- مقاومة التآكل: Aluminium itself is corrosion-resistant, but for harsh environments (like coastal areas or poolside), enhanced finishes like marine-grade powder coating or specific anodizing might be necessary.
Waterproof LED Strips
Often, achieving a fully waterproof system involves using IP-rated LED strips ضمن an IP-rated profile. These strips typically have a silicone sleeve or coating. Combining both provides maximum protection.
Potting or Encapsulation (Less Common in Profiles)
In some high-spec applications, the entire profile cavity containing the LED strip might be filled with a clear epoxy or silicone resin (potting). This creates a solid, completely sealed unit but makes maintenance or replacement impossible. It’s more common for integrated fixtures than standard profile systems.
اعتبارات خاصة بالتطبيق
Different wet or outdoor areas pose unique challenges:
Bathrooms and Kitchens
- التحدّي: Steam, humidity, occasional splashes, cleaning agents.
- الحل: IP65-rated profiles are generally sufficient for areas away from direct shower streams. Ensure materials are compatible with common cleaning products. Proper sealing of end caps and wire entries is crucial.
Pool Areas and Spas
- التحدّي: Splashing, high humidity, chlorine or saltwater exposure.
- الحل: IP67 is often the minimum recommendation for near-pool areas. Consider materials resistant to chlorine or salt corrosion. For underwater lighting, IP68 profiles specifically designed for submersion are required.
Outdoor Facades and Landscaping
- التحدّي: Rain, snow, dust, UV exposure, temperature fluctuations.
- الحل: IP67 is usually suitable for general outdoor use. UV-resistant diffusers (often PMMA) are important to prevent yellowing or degradation. Ensure the system can handle the expected temperature range. Thermal expansion/contraction over long runs needs consideration during installation.

Installation Best Practices for Waterproof Profiles
Proper installation is even more critical for waterproof systems:
- Sealant Application: Use manufacturer-recommended silicone sealant generously on end caps and wire entry points. Ensure surfaces are clean and dry before application.
- Connector Protection: Use IP-rated connectors for joining sections or connecting to the power supply. Standard connectors are a common failure point. Heat shrink tubing with adhesive lining can also help seal connections.
- Mounting: Ensure mounting doesn’t compromise the profile’s integrity (e.g., avoid drilling unnecessary holes). Use appropriate corrosion-resistant mounting hardware.
- Drainage: For some outdoor surface-mount applications where complete sealing is difficult, consider slight angling or weep holes (if manufacturer approved) in non-critical locations to allow any minor condensation to escape, though this usually lowers the IP rating.
At PTSMAKE, while we don’t manufacture the profiles themselves, we frequently assist clients by designing and manufacturing custom, high-precision components like specialized end caps, gaskets, or mounting brackets using injection molding or CNC machining to enhance the sealing and integration of these waterproof LED Aluminium Profile systems into their final products. Ensuring every part of the assembly contributes to the required IP rating is key. Choosing the right waterproof solution ensures your lighting investment remains safe, functional, and visually appealing, even when exposed to the elements.
Common Mistakes to Avoid When Using LED Profiles
Using LED Aluminium Profiles seems straightforward, right? Yet, many installations fall short, plagued by issues that could have been easily prevented. Don’t let simple mistakes compromise your sleek lighting design or the lifespan of your LEDs.
Avoid common pitfalls like inadequate heat dissipation, choosing the wrong profile size, poor diffuser selection, and sloppy installation. Getting these details right ensures optimal LED performance, longevity, and the professional finish your project deserves when using LED Aluminium Profiles.
Having worked on numerous projects at PTSMAKE where components interact with lighting systems, I’ve seen firsthand how these seemingly small errors can derail an otherwise great design. Let’s dive into the most frequent mistakes and how you can steer clear of them. Understanding these can save you time, money, and frustration, ensuring your LED strip lighting looks and performs exactly as intended.
Mistake 1: Ignoring Heat Dissipation Needs
This is arguably the most critical mistake impacting LED longevity. LEDs produce heat, and aluminium profiles are excellent heat sinks, but only if used correctly.
The Problem
LEDs degrade faster at higher temperatures. Their brightness decreases (lumen depreciation), their color can shift, and their overall lifespan is significantly shortened. Simply putting an LED strip into any profile isn’t enough if heat dissipation isn’t effective.
Common Errors
- Choosing Undersized Profiles: Selecting a profile that is too small or thin for the heat output of the specific LED strip (especially high-power strips). A tiny profile offers minimal surface area to dissipate heat.
- Poor LED Strip Contact: Failing to ensure the LED strip’s adhesive backing makes full, continuous contact with the profile’s internal base. Air gaps act as insulators, trapping heat right at the LEDs. The strip should be pressed down firmly along its entire length.
- Obstructed Airflow: Installing profiles in tightly sealed locations with zero airflow around the exterior, preventing the dissipated heat from escaping into the ambient environment.
How to Avoid It
Always choose a profile with sufficient mass and surface area relative to the wattage/heat output of your LED strip. Ensure the strip is securely adhered inside the profile. Whenever possible, allow for some air circulation around the installed profile. In past projects, we’ve seen significant temperature differences based purely on the profile choice and installation method.
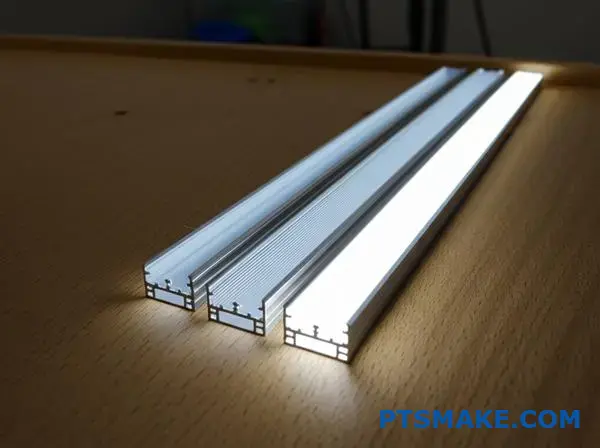
Mistake 2: Improper Sizing and Fit
Size matters in several ways when working with LED Aluminium Profiles – both internally for the strip and externally for the installation.
Internal Fit Issues
- Profile Too Narrow: Trying to force a wide LED strip into a profile channel that’s too narrow. This can damage the strip’s edges or PCB and prevent it from lying flat, hindering heat dissipation.
- Profile Too Wide: While less damaging, using a profile significantly wider than the LED strip can look sloppy and might make centering the strip difficult, potentially leading to uneven light distribution through the diffuser.
External Fit and Cutting Issues
- Incorrect Dimensions for Recessing: For recessed profiles, inaccurately cutting the groove in the mounting surface (wall, ceiling, furniture). Too tight, and the profile won’t fit; too loose, and you get unsightly gaps. Precision is key here, something we value highly at PTSMAKE in our CNC machining work, as even small dimensional errors can ruin an integrated look.
- Poor Cutting: Using the wrong tools or techniques to cut profiles to length. This results in burred, uneven edges that look unprofessional, make joining sections difficult, and can even snag wires or prevent end caps from fitting correctly. A fine-toothed saw suitable for non-ferrous metals is essential.
Quick Guide: Matching Strip Width to Profile
| Common LED Strip Width | Recommended Minimum Internal Profile Width | الملاحظات |
|---|---|---|
| 8mm | > 8.5mm | Allows slight tolerance |
| 10 مم | > 10.5mm | Most common size |
| 12mm | > 12.5mm | Often for higher power or RGBW strips |
| Custom / Wide Strips | Profile Specific | Always check manufacturer’s specifications |
Always measure your LED strip width and check the internal width specification of the profile before purchasing.
Mistake 3: The Wrong Diffuser Choice (Again!)
We discussed diffuser types in detail previously, but choosing incorrectly remains a common error impacting the final visual outcome.
The Repercussions
- Unwanted Hotspots: Using a clear or sometimes even a frosted diffuser with a shallow profile or low-density LED strip, resulting in visible dots of light instead of a smooth, linear glow. This often undermines the aesthetic goal.
- Insufficient Brightness: Opting for an opal diffuser for maximum smoothness but failing to account for its lower light transmission (often 30-50% reduction). This can leave the area under-lit unless a brighter LED strip was specified initially.
- Wrong Material for Environment: Using a standard PC diffuser outdoors without UV protection, leading to yellowing and degradation over time.
Avoiding the Issue
Revisit your project goals. If a seamless line of light is critical and the fixture is visible, an opal diffuser paired with a suitably deep profile and high-density LED strip is often necessary. If maximum brightness is key and dots aren’t an issue, clear is fine. Balance brightness and diffusion with frosted options. Always consider the viewing angle and environment.
Mistake 4: Botched Installation Techniques
A high-quality profile and strip can be let down by poor installation practices.
Common Installation Errors
- Insecure Mounting: Relying solely on weak double-sided tape, especially on textured surfaces or ceilings, leading to profiles detaching over time. Using insufficient mounting clips or failing to use appropriate wall anchors.
- Misalignment: Installing long runs without using a level or alignment guides/connectors, resulting in visibly crooked lines or uneven gaps between sections.
- Wire Management Neglect: Leaving wires exposed, pinched, or poorly routed. This looks unprofessional and can be a safety hazard. Plan wire paths and concealment methods before installation.
- Ignoring Material Expansion: Not allowing for thermal expansion and contraction on very long outdoor runs. Different materials expand at different rates (measured by the معامل التمدد الحراري6), which can cause buckling or stress if sections are butt-jointed too tightly without any expansion gaps.
Best Practices Refresher
Use appropriate mounting hardware (clips, screws, anchors) for the surface and weight. Employ levels and alignment tools. Plan wiring routes carefully. For outdoor runs, consult manufacturer guidelines regarding expansion.
Mistake 5: Overlooking the Environment
Using interior-grade profiles in wet or outdoor areas is a recipe for failure. As covered previously, specific environments demand specific protection levels. Using a non-IP-rated profile in a bathroom, kitchen splashback, or exposed outdoor setting will lead to moisture ingress, corrosion, and likely failure of the LED strip. Always match the profile’s IP rating (Ingress Protection) to the demands of the environment.
By being mindful of these common mistakes – focusing on heat management, correct sizing, appropriate diffuser choice, careful installation, and environmental suitability – you can ensure your LED Aluminium Profile projects are successful, delivering both stunning aesthetics and reliable, long-lasting performance.
Custom Applications: From Furniture to Architectural Features
Ready to move beyond basic lighting? LED Aluminium Profiles unlock a world of creative possibilities, transforming everyday objects and architectural spaces into stunning focal points. Let’s explore how these versatile channels become design tools.
LED Aluminium Profiles enable unique custom lighting applications, seamlessly integrating light into furniture like shelves and headboards, architectural features such as coves and stairs, and creating captivating effects like backlighting for translucent materials, enhancing both function and aesthetics.
The real magic happens when we start thinking outside the standard under-cabinet strip. LED Aluminium Profiles offer the structure, protection, and thermal management needed to embed light in ways that were previously difficult or impossible. From subtle accents to dramatic statements, these profiles are essential for custom lighting solutions. In our work at PTSMAKE, we often assist clients in developing precision components that make these creative integrations possible, ensuring the final product is both beautiful and reliable.
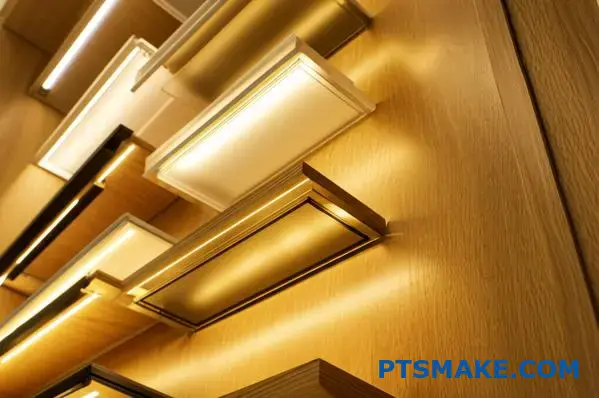
Illuminated Shelving: Function Meets Style
Integrating lighting directly into shelving is a popular custom application, adding both practical task lighting and sophisticated ambiance.
Design Approaches
You can achieve this in several ways:
- Surface Mounting: Attaching slim profiles to the underside of shelves provides downward task lighting, perfect for kitchen cabinets or bookshelves.
- Recessed Mounting: Routing a channel into the shelf edge or underside allows the profile to sit flush, creating a seamless look. This is common in high-end cabinetry and retail displays.
- Edge Lighting (for Glass): Specific profiles are designed to clamp onto the edge of glass shelves, directing light through the glass for a striking effect.
الاعتبارات الرئيسية
Wiring needs careful planning to remain hidden, often routed through shelf supports or behind back panels. Heat dissipation is also important, especially if shelves are enclosed; ensure the chosen profile has adequate heat sinking capacity for the LED strip used. Frosted or opal diffusers are generally preferred to minimize glare and provide even illumination on the items displayed below.
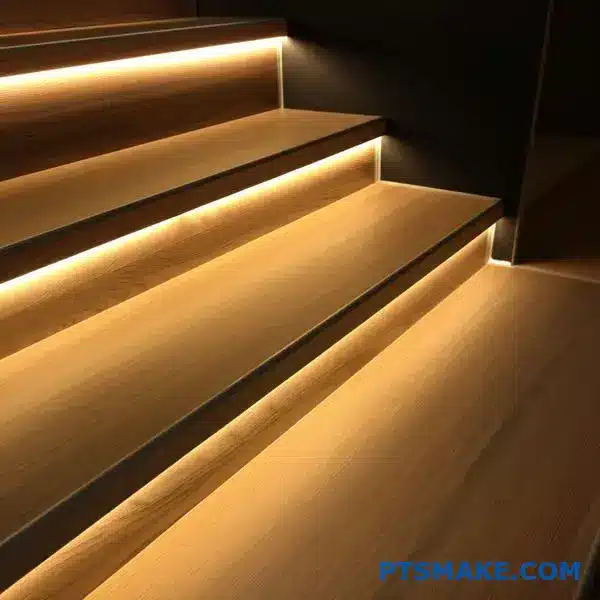
Stair Lighting: Safety Through Ambiance
Stair lighting is a prime example of blending safety with aesthetic appeal. LED Aluminium Profiles make it possible to illuminate steps clearly without harsh overhead lighting.
Common Techniques
- Stair Nosing Profiles: These specialized profiles fit onto the front edge of each step, often incorporating anti-slip features alongside the LED channel. They direct light downwards and forwards onto the tread below.
- Recessed into Risers: Embedding slim profiles into the vertical face (riser) of each step creates a wash of light downwards.
- Recessed into Stringers: Installing profiles along the side walls (stringers) adjacent to the stairs provides pathway illumination.
Durability and Glare
Stair applications demand durability. Profiles must withstand occasional impacts, and if outdoors or in potentially wet areas (near entrances), an appropriate IP rating (like IP65 or IP67) is crucial. Using opal diffusers helps minimize glare, preventing disorientation as people ascend or descend the stairs. Based on past projects, ensuring robust mounting is also key due to vibrations from foot traffic.
Cove Lighting: The Beauty of Indirect Light
Cove lighting involves hiding the light source, typically near the ceiling, to cast a soft, indirect glow upwards or outwards, washing walls and ceilings in light.
Profile Choices
- Simple Surface Mount: Often, a basic surface mount profile angled slightly upwards or outwards within the cove structure is sufficient.
- Corner Profiles: These fit neatly into the wall-ceiling junction and naturally direct light outwards at a 45-degree angle.
Creating the Effect
The goal is an even, shadow-free illumination. This requires careful placement to hide the profile itself from direct view. Using higher density LED strips and opal diffusers helps ensure a smooth, continuous glow rather than visible dots reflected on the ceiling. Cove lighting adds a sense of height and openness to a room, creating a sophisticated ambiance.
Backlighting Magic: Illuminating Translucent Materials
One of the most visually striking custom applications is backlighting panels made of glass, acrylic, onyx, resin, or other translucent materials. LED Aluminium Profiles provide the ideal framework for this.
How It Works
Profiles are typically installed around the perimeter of the panel, directing light inwards. For larger panels, a grid pattern behind the material might be necessary for even illumination. Slim, low-profile surface mount channels are often sufficient.
Achieving Evenness
The biggest challenge is achieving perfectly even light distribution without visible hotspots or shadows. This depends on:
- Material Diffusing Properties: Some materials diffuse light better than others. Frosted glass or acrylic works well.
- Distance: Maintaining a consistent distance between the LEDs and the back of the panel is crucial.
- LED Density & Diffuser: High-density LED strips combined with opal diffusers in the profiles help blend the light sources. The interaction of light with the material can sometimes involve effects like Photoluminescence7, where the material itself glows after absorbing light energy.
Applications range from illuminated kitchen splashbacks and countertops to feature walls, bar fronts, and signage. Precision in mounting the profiles and managing wiring is key to a flawless result.
Beyond the Basics: Bespoke Creations
The versatility of LED Aluminium Profiles means the possibilities are almost limitless, constrained only by imagination and practical considerations.
Furniture Integration
Beyond shelves, think about embedding light into:
- Bed Headboards: Creating a soft reading light or ambient glow.
- Wardrobes: Automatic illumination when doors open.
- Display Cabinets: Highlighting collectibles or products.
- Mirror Surrounds: Providing flattering, even facial illumination.
Architectural Accents
Use profiles to:
- Highlight Columns or Beams: Grazing light up or down structural elements.
- Frame Window Reveals: Creating a subtle nighttime feature.
- Outline Ceiling Details: Defining trays or coffers.
- Floor-Integrated Lighting: Using walk-over rated profiles for pathways or accents (ensure proper IP rating).
Custom Project Considerations
| نوع التطبيق | Common Profile Style | Key Challenge | Typical Benefit |
|---|---|---|---|
| Shelving | Surface, Recessed | Hidden Wiring | Task/Accent Light |
| Stairs | Nosing, Recessed | Durability, Glare | Safety, Ambiance |
| Cove Lighting | Surface, Corner | Even Indirect Glow | Ambiance, Space |
| Backlighting | Slim Surface Mount | Even Diffusion | Feature Illumination |
| الأثاث | Slim Recessed/Surface | Integration, Wiring | Function, Aesthetics |
| الهندسة المعمارية | Varies (Recessed often) | Seamless Integration | Definition, Drama |
At PTSMAKE, we sometimes collaborate with designers on unique projects requiring custom-machined mounting hardware or precisely modified end caps to perfectly integrate these LED Aluminium Profiles into novel applications, ensuring the lighting element feels truly built-in and intentional. Exploring these custom uses allows light to become an integral part of the design narrative, enhancing spaces in truly unique ways.
Cost Considerations and Long-Term Value
Think LED Aluminium Profiles are just simple channels? The initial price tag might seem straightforward, but it only reveals part of the picture. How does your choice truly affect your budget and project success down the line? Let’s uncover the real costs and hidden value.
Key cost factors for LED Aluminium Profiles include material grade, profile complexity, size, finish, and order quantity. However, quality profiles offer significant long-term value through superior heat management, extended LED life, and reduced maintenance, ensuring a better Return on Investment (ROI).
When specifying or purchasing LED Aluminium Profiles, it’s easy to focus solely on the upfront cost. However, understanding the factors that influence that price and, more importantly, the long-term implications of your choice is crucial for making smart decisions. A seemingly cheaper option might end up costing more over the lifespan of the installation. In my experience advising clients on component choices at PTSMAKE, looking beyond the initial quote is essential for project success and overall value.
Understanding the Initial Price Tag
Several factors contribute to the initial cost of LED Aluminium Profiles. Being aware of these can help you evaluate quotes and understand where costs originate.
Material Matters
The primary material is aluminium, but its grade and quality vary. Higher purity aluminium or specific alloys designed for better thermal conductivity or strength might cost more. The use of recycled aluminium content can sometimes influence price, though quality control is paramount here. Thicker profile walls also mean more material, directly impacting cost.
Design Complexity and Size
More intricate profile shapes require complex extrusion dies, increasing manufacturing costs. Larger or heavier profiles naturally consume more raw material and may require more robust handling and shipping, adding to the price. Profiles designed for specific functions (like trimless or walk-over rated) often involve more complex engineering and production steps.
Finishes and Customization
The standard finish is typically satin anodized aluminium. Custom finishes like powder coating in specific RAL colors, brushed effects, or polished surfaces require additional processing steps, increasing the cost. Cutting profiles to custom lengths, drilling mounting holes, or other post-extrusion modifications also add to the labor and production time, impacting the final price.
Order Volume and Supplier Choice
Like most manufactured goods, economies of scale apply. Larger order volumes generally result in a lower price per unit. Supplier choice also plays a role; established manufacturers with strong quality control might have higher prices than smaller operations, but they often provide greater consistency and reliability – factors crucial for large projects or OEM applications.
Beyond the Sticker Price: The Long-Term Value Proposition
Focusing only on the initial purchase price is shortsighted. High-quality LED Aluminium Profiles deliver value far beyond their material cost.
Thermal Management = Longer LED Life
This is the most significant long-term benefit. Quality profiles made from appropriate aluminium grades with sufficient mass act as effective heat sinks. By efficiently drawing heat away from the LED strip, they significantly lower the operating temperature. Lower temperatures directly translate to slower lumen depreciation and a much longer operational lifespan for the LEDs. Cheap, thin profiles with poor thermal contact simply don’t offer the same level of protection, leading to premature LED failure and the associated replacement costs (both materials and labor). Our observations consistently show LEDs in well-designed profiles maintain brightness and last longer.
Reduced Maintenance and Replacement Costs
Well-made profiles provide better physical protection for the delicate LED strip against dust, moisture (especially IP-rated ones), and accidental impacts. This reduces the likelihood of damage and the need for repairs or replacements. The durability of the finish (e.g., quality anodizing) also means the profile itself will maintain its appearance for longer, avoiding the need for aesthetic refurbishment.
Enhanced Aesthetics and Project Quality
Let’s be honest, flimsy or poorly finished profiles look cheap and can detract from the overall quality perception of the space or product they are installed in. Investing in quality profiles with good diffusers ensures a professional, seamless look that enhances the perceived value of the project, whether it’s architectural lighting, retail displays, or integrated furniture lighting.
Calculating the Real ROI
To truly understand the value, consider the التكلفة الإجمالية للملكية (TCO)8. This calculation includes the initial purchase price plus all costs incurred over the product’s lifetime, such as energy consumption (though profile choice has minimal impact here), maintenance labor, replacement LED strips, and replacement profile costs if the original fails or degrades.
Here’s a conceptual comparison:
| الميزة | Low-Quality Profile Example | High-Quality Profile Example | التأثير |
|---|---|---|---|
| التكلفة الأولية | أقل | أعلى | Immediate budget consideration |
| الأداء الحراري | فقير | ممتاز | Affects LED lifespan directly |
| LED Lifespan | Shorter (e.g., 20,000 hrs) | Longer (e.g., 50,000+ hrs) | Fewer replacement cycles needed |
| مستوى الحماية | الحد الأدنى | جيد | Reduced risk of accidental damage |
| تواتر الصيانة | Higher (due to failures/damage) | أقل | Lower labor costs over time |
| Replacement Cycles | أكثر تواتراً | أقل تواتراً | Lower long-term material & labor costs |
| Aesthetic Durability | May degrade faster | Maintains appearance | Better long-term look, higher perceived value |
| Overall TCO | يحتمل أن يكون أعلى | في كثير من الأحيان أقل | Demonstrates long-term value |
This table illustrates how the higher initial cost of a quality profile can lead to lower overall expenses and better value over time.
Making Smart Procurement Decisions
Balancing cost and quality is key. While budget constraints are real, compromising too much on profile quality can be counterproductive.
الموازنة بين التكلفة والجودة
Identify the critical requirements for your application. Is superior thermal management essential due to high-power LEDs? Is a specific aesthetic finish crucial? Is IP rating non-negotiable? Focus spending on the features that deliver the most value for your specific needs. Perhaps a standard finish is acceptable if the profile is hidden, allowing budget allocation towards a profile with better thermal mass. Value engineering should focus on optimizing function without sacrificing essential performance.
Partnering with the Right Supplier
Working with a reliable supplier who understands materials, manufacturing tolerances, and quality control is invaluable. At PTSMAKE, while we specialize in precision CNC machining and injection molding, we often integrate components sourced from various suppliers into complex assemblies for our clients. We know the importance of supplier reliability and consistent quality firsthand. A good supplier can provide technical support, ensure consistent product quality batch after batch, and offer transparency about material specifications – all contributing to long-term value and peace of mind.
Ultimately, viewing LED Aluminium Profiles not just as a commodity but as a critical component influencing performance, longevity, and aesthetics allows for a more strategic approach to procurement, ensuring you achieve the best possible return on your investment.
Learn more about how LED brightness decreases over time and why managing heat is key. ↩
Click to understand the manufacturing process that allows aluminium to be shaped into diverse profile designs. ↩
Discover how these materials improve heat transfer between components, crucial for electronics cooling. ↩
Learn how this property influences the way light bends when passing through the diffuser material. ↩
Click here to understand the standard system for classifying degrees of protection provided by enclosures. ↩
Understand how temperature changes affect material dimensions, crucial for preventing installation issues. ↩
Explore how certain materials absorb light and re-emit it, affecting backlighting appearance and color. ↩
Understand the full cost implications beyond purchase price, including maintenance and longevity factors. ↩