Ever tried to explain what CNC turning is to someone who needs precision parts? It’s frustrating when they don’t understand this critical manufacturing process. Many businesses struggle with quality issues and inconsistent results because they lack knowledge about proper turning techniques.
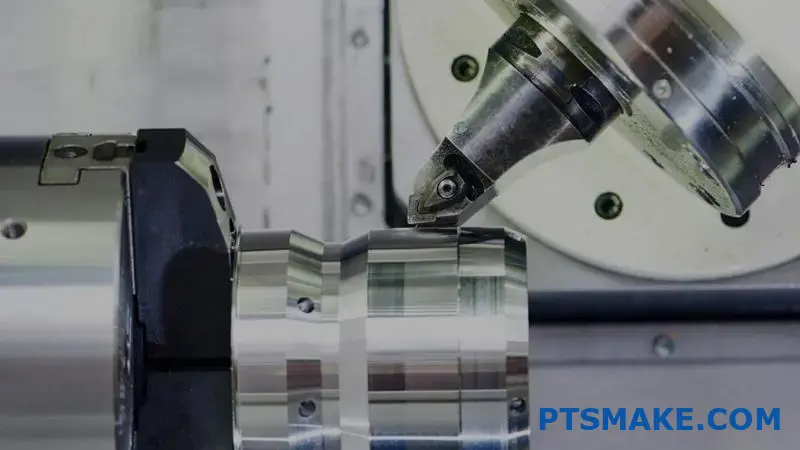
CNC turning is a machining process where a cutting tool removes material from a rotating workpiece to create cylindrical parts with precise dimensions. The computer-controlled lathe follows programmed instructions to produce complex shapes with exceptional accuracy and repeatability.
I’ve seen companies transform their production capabilities after understanding CNC turning properly. This technology has revolutionized how we manufacture parts at PTSMAKE. Let me walk you through everything you need to know about CNC turning – from the basic principles to the advanced applications that might be perfect for your next project.
What Is the Difference Between CNC Milling and CNC Turning?
Have you ever been confused about which CNC machining process to choose for your project? Perhaps you’ve received quotes for both milling and turning but aren’t sure which would deliver the best results for your specific part design? This confusion is more common than you might think.
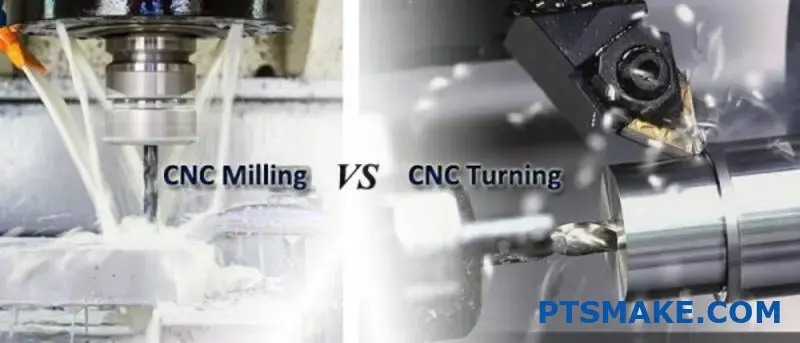
CNC milling removes material using rotating cutting tools while the workpiece remains stationary. CNC turning, however, rotates the workpiece against a fixed cutting tool. Milling excels at creating complex shapes with flat surfaces, while turning is ideal for cylindrical parts with rotational symmetry.
Understanding CNC Machining Fundamentals
CNC machining has revolutionized manufacturing by automating the process of creating precise parts from various materials. At its core, CNC (Computer Numerical Control) technology uses computer programming to control the movement of machinery, allowing for consistent, accurate production without constant human intervention.
When considering CNC machining options, milling and turning stand out as the two most common processes. While both remove material to create finished parts, they operate on fundamentally different principles. Let’s break down these differences to help you make informed decisions for your next project.
CNC Milling: Process and Capabilities
In CNC milling, the workpiece is secured to a table while rotating cutting tools remove material. The milling machine can move the cutting tool in multiple axes (typically 3-5 axes in modern machines), allowing for complex geometries and features.
Key Characteristics of CNC Milling
- Multiple Cutting Surfaces: Milling tools have multiple cutting edges that intermittently engage with the workpiece
- Versatile Material Removal: Can create flat surfaces, contours, slots, pockets, and 3D shapes
- Interrupted Cutting Action: The tool contacts and disengages from the material repeatedly
Milling is particularly effective for parts with complex features like square shoulders, flat surfaces, and intricate geometries. In my experience at PTSMAKE, we frequently use milling for components requiring tight tolerances on non-cylindrical features.
CNC Turning: Process and Capabilities
Turning operates by rotating the workpiece at high speed while a stationary cutting tool removes material. This process is fundamentally different from milling because the workpiece moves while the tool remains relatively fixed (though it can move along axes to create different profiles).
Key Characteristics of CNC Turning
- Continuous Cutting Action: The tool maintains constant contact with the rotating workpiece
- Rotational Symmetry: Primarily creates cylindrical or conical features
- Single-Point Cutting: Typically uses tools with a single cutting edge
At PTSMAKE, we recommend turning for parts with rotational symmetry1 and cylindrical features like shafts, pins, and mechanical components.
Comparative Analysis: Milling vs. Turning
To help clarify the key differences between these processes, I’ve created this comparative table:
| Feature | CNC Milling | CNC Turning |
|---|---|---|
| Workpiece Movement | Stationary | Rotates |
| Tool Movement | Rotates and moves along axes | Stationary (moves along axes) |
| Ideal Part Geometry | Complex shapes, flat surfaces, pockets | Cylindrical, conical shapes |
| Typical Tolerances | ±0.001" to ±0.005" | ±0.0005" to ±0.003" |
| Surface Finish | 16-125 μin Ra | 8-63 μin Ra |
| Production Speed | Moderate to slow | Fast for simple parts |
| Material Versatility | Excellent for most materials | Good but with some limitations |
Material Considerations
Both processes can handle a wide range of materials, but there are some important distinctions:
Materials for Milling
- Excels with hard materials like stainless steel and titanium
- Great for plastics, aluminum, and other non-ferrous metals
- Can efficiently machine materials with inconsistent hardness
Materials for Turning
- Ideal for uniform materials that cut cleanly
- Particularly effective with brass, aluminum, and mild steel
- May struggle with very hard or brittle materials unless special tooling is used
Cost and Efficiency Factors
When helping clients choose between milling and turning at PTSMAKE, I consider several cost and efficiency factors:
- Production Volume: Turning is often more cost-effective for high-volume production of simple cylindrical parts
- Setup Time: Milling typically requires more complex fixturing and setup
- Material Waste: Turning generally produces less material waste for cylindrical parts
- Surface Finish: Turning often achieves better surface finishes with fewer operations
For many projects, the decision isn’t either/or but rather which process to use for different features of the same part. We frequently combine both processes using mill-turn machines to achieve optimal results while minimizing production time and costs.
Making the Right Choice for Your Project
The selection between precision CNC turning and milling should be driven by your part’s geometry, tolerance requirements, and production volume. For parts with primarily cylindrical features, turning is usually the better option. For parts with flat surfaces, pockets, and complex geometries, milling is typically the way to go.
At PTSMAKE, we analyze each project individually to recommend the most appropriate machining strategy. Sometimes, this means using both processes to achieve the optimal balance of quality, cost, and lead time.
Understanding Common CNC Turning Tolerance Standards and Requirements
Have you ever received precision-turned parts that failed final inspection or assembly? Or spent hours troubleshooting why components that should fit together perfectly are creating alignment issues in your high-precision application? Tolerance misunderstandings can derail projects, delay launches, and significantly impact your bottom line.
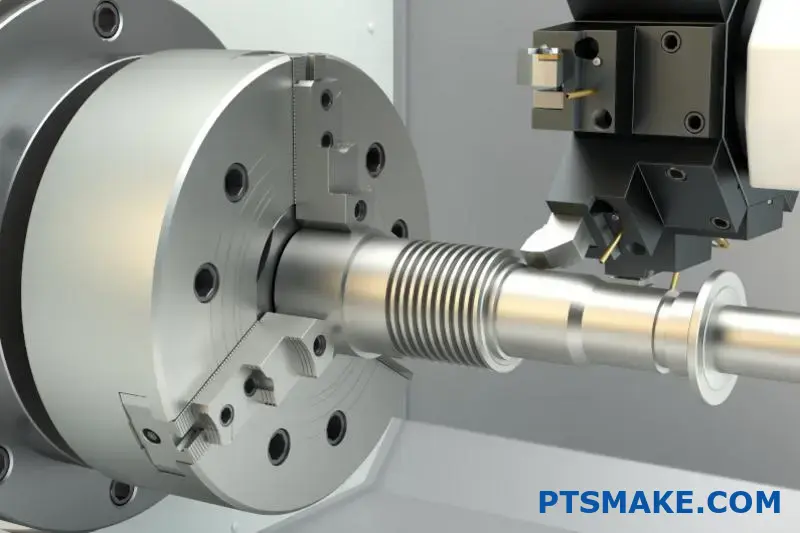
CNC turning tolerances for high-precision applications typically range from ±0.0005" to ±0.001" (0.0127mm to 0.0254mm). These tight tolerances are essential for aerospace, medical devices, and precision instrumentation where component fit and functionality depend on exceptional dimensional accuracy.
Standard Tolerance Classifications for CNC Turning
When discussing precision CNC turning tolerances, it’s important to understand the established classification systems. The most widely recognized standard is the ISO system, which categorizes tolerances into different grades from IT01 (most precise) to IT16 (least precise). In high-precision applications, we typically work with grades IT5 to IT7.
During my years at PTSMAKE, I’ve found that many engineers specify tighter tolerances than necessary, which drives up costs without adding functional value. Understanding these standards helps prevent this common mistake.
ISO Tolerance Grade Classifications
The ISO grade system provides a systematic approach to tolerance specification. Here’s a breakdown of common grades used in precision turning:
| ISO Grade | Typical Tolerance Range | Common Applications |
|---|---|---|
| IT5 | ±0.0002" (0.005mm) | Precision gauges, measuring instruments |
| IT6 | ±0.0003" (0.008mm) | Precision bearings, hydraulic components |
| IT7 | ±0.0005" (0.013mm) | High-precision shafts, medical devices |
| IT8 | ±0.0008" (0.02mm) | Automotive components, general machinery |
| IT9 | ±0.0012" (0.03mm) | Standard machined parts |
When communicating with manufacturers, specifying the ISO grade provides a clear, internationally recognized standard that removes ambiguity about expectations.
Material-Specific Tolerance Considerations
Not all materials can achieve the same tolerance levels with consistent reliability. This is one of the most overlooked aspects of tolerance specification I encounter when reviewing client requirements.
Materials with high thermal expansion coefficients, like aluminum, may require more generous tolerances than materials like stainless steel or titanium. The metallurgical stability2 of the material directly impacts how tight tolerances can be maintained over time and through varying environmental conditions.
For example, when turning parts from 6061 aluminum, we typically recommend tolerances no tighter than ±0.0008" for critical dimensions, while 304 stainless steel can reliably maintain ±0.0005" in many cases.
Material-Based Tolerance Recommendations
Based on our production experience at PTSMAKE, here are practical tolerance guidelines for common materials in precision applications:
| Material | Practical Minimum Tolerance | Considerations |
|---|---|---|
| Aluminum | ±0.0008" (0.02mm) | Higher thermal expansion, softer material |
| Stainless Steel | ±0.0005" (0.013mm) | Good stability, harder to machine |
| Brass | ±0.0006" (0.015mm) | Excellent machinability, moderate stability |
| Titanium | ±0.0005" (0.013mm) | Excellent stability, challenging to machine |
| Plastics (PEEK, Delrin) | ±0.001" (0.025mm) | Moisture absorption, thermal expansion |
Feature-Specific Tolerance Requirements
Different geometric features have different capabilities when it comes to holding tight tolerances. In my experience, this nuanced understanding separates novice designers from seasoned engineers.
For high-precision turned parts, consider these feature-specific guidelines:
- External Diameters: Generally capable of the tightest tolerances (±0.0005")
- Internal Diameters: Slightly less precise than external features (±0.0007")
- Depths and Lengths: More challenging to control precisely (±0.001")
- Threads: Typically specified by class fit rather than decimal tolerances
- Surface Finish: Directly related to tolerance capability (finer finishes allow tighter tolerances)
When designing a precision shaft for a medical device recently, I recommended tightening tolerances only on the critical bearing surfaces while relaxing tolerances on less functional features. This approach reduced manufacturing costs by 23% without compromising performance.
Economic Implications of Tolerance Specification
There’s a direct correlation between tolerance requirements and manufacturing costs. This relationship isn’t linear—it’s exponential. At PTSMAKE, we often show clients this cost-to-tolerance curve to help them make informed decisions.
A good rule of thumb I share with clients: tightening tolerances by 50% typically increases manufacturing costs by 80-100%. This dramatic increase occurs because tighter tolerances require:
- More precise machinery
- Slower cutting speeds
- Additional quality checks
- More frequent tool changes
- Higher rejection rates
Specifying appropriate tolerances is one of the most effective ways to control manufacturing costs while ensuring product functionality. I always encourage engineers to ask: "What tolerance is required for this feature to function as intended?" rather than defaulting to the tightest possible specifications.
Material Properties and Their Impact on CNC Turning Precision?
Have you ever wondered why some materials machine beautifully while others leave you battling with poor surface finishes and dimensional issues? The frustration of adjusting parameters repeatedly only to still end up with subpar results can be maddening, especially when project deadlines loom large.
Material selection is arguably the most critical factor affecting precision CNC turning outcomes. Each material’s unique properties—including hardness, thermal conductivity, and microstructure—directly influence machining parameters, tool wear rates, achievable tolerances, and surface quality in turned components.
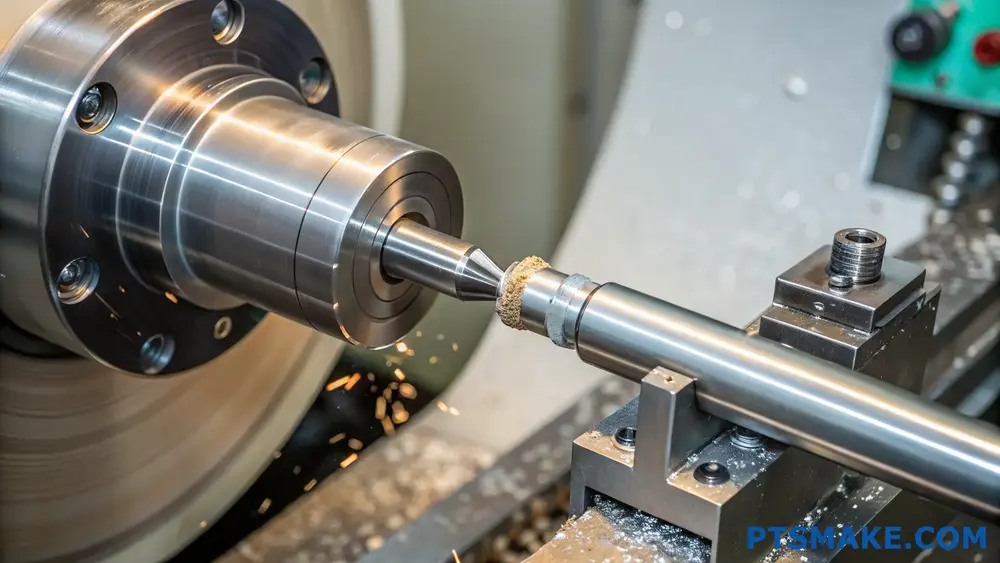
Critical Material Properties for Precision Turning
When selecting materials for precision CNC turning projects, understanding how specific properties affect machining outcomes is essential. I’ve found that considering these properties early in the design process helps prevent costly modifications later.
Machinability Index and Its Significance
The machinability3 of a material refers to how easily it can be cut to achieve the desired surface finish and dimensional accuracy. Materials with high machinability indices require less power, experience reduced tool wear, and typically yield better surface finishes. In my experience at PTSMAKE, we’ve established a practical rating system for comparing different materials:
| Material Type | Machinability Rating (1-100) | Characteristics During Turning |
|---|---|---|
| Free-cutting brass | 90-100 | Excellent chip formation, minimal tool wear |
| Aluminum 6061 | 80-90 | Forms long chips, excellent surface finish |
| Mild steel | 60-70 | Moderate cutting forces, good finish |
| Stainless 304 | 40-50 | Work hardens, requires rigid setup |
| Titanium alloys | 20-30 | Poor thermal conductivity, sticky |
| Inconel 718 | 10-20 | Severe tool wear, difficult chip breaking |
Hardness and Its Effect on Turning Operations
Material hardness directly impacts tool selection, cutting speeds, and achievable tolerances. Harder materials generally require:
- Carbide or ceramic cutting tools instead of high-speed steel
- Lower cutting speeds to prevent excessive heat generation
- More rigid machine setups to minimize vibration
- More frequent tool changes due to accelerated wear
For example, when turning hardened steel (>45 HRC), I typically reduce cutting speeds by 40-50% compared to the same material in an annealed state. This adjustment, while reducing productivity, is essential for maintaining dimensional accuracy and tool life.
Thermal Properties: The Hidden Challenge
Many engineers overlook the critical role thermal conductivity plays in precision turning. Materials with poor thermal conductivity (like titanium and stainless steel) concentrate heat at the cutting interface, leading to:
- Accelerated tool wear
- Thermal expansion of the workpiece during machining
- Potential microstructural changes in the material
- Reduced dimensional stability
During a recent aerospace project at PTSMAKE, we had to turn titanium components with ±0.005mm tolerances. The key to success was implementing appropriate cooling strategies and making multiple light finishing passes to minimize thermal effects.
Material-Specific Turning Strategies
Aluminum Alloys: Speed and Surface Finish Considerations
Aluminum alloys are highly machinable but present unique challenges. Their high thermal expansion coefficient (approximately 2.3 × 10^-5 per °C) means dimensions can change significantly during machining if heat isn’t properly managed. When turning aluminum at PTSMAKE, I’ve implemented these best practices:
- Use polished cutting edges to prevent material buildup
- Apply higher cutting speeds (typically 300-500 m/min)
- Employ flood coolant to maintain dimensional stability
- Select appropriate tool geometries to manage the long, stringy chips
Stainless Steel: Combating Work Hardening
Austenitic stainless steels (like 304 and 316) are notorious for work hardening during turning operations. This phenomenon creates a hardened layer that accelerates tool wear and compromises surface finish. My approach includes:
- Maintaining continuous cutting engagement to prevent the tool from rubbing the hardened layer
- Using higher feed rates with moderate depths of cut
- Selecting cutting tools with positive rake angles to reduce cutting forces
- Applying consistent coolant flow to manage heat generation
Exotic Alloys: The Ultimate Precision Challenge
Materials like Inconel, Hastelloy, and titanium alloys demand specialized turning strategies. These materials combine low thermal conductivity with high strength retention at elevated temperatures, creating severe challenges for precision turning.
For these materials, I’ve found success with:
- Rigid machine setups with minimal overhang
- Selecting advanced coating technologies for cutting tools
- Implementing high-pressure coolant systems (70+ bar)
- Using lower cutting speeds with consistent feed rates
- Performing regular in-process inspection to catch dimensional drift
By understanding these material-specific requirements, we’ve consistently achieved tolerances of ±0.01mm even in the most challenging exotic alloys.
What Surface Finishes Are Available for Precision CNC Turned Parts?
Have you ever received precision CNC turned parts that looked perfect but didn’t meet your functional requirements? Or perhaps you’ve struggled to communicate exactly what surface finish you need for your application? The difference between success and failure in many engineering projects often comes down to these seemingly small surface details.
Surface finishes for precision CNC turned parts include as-machined, bead blasting, anodizing, powder coating, electroplating, polishing, and brushing. Each finish serves specific functional and aesthetic purposes, affecting properties like corrosion resistance, wear characteristics, appearance, and part interaction.
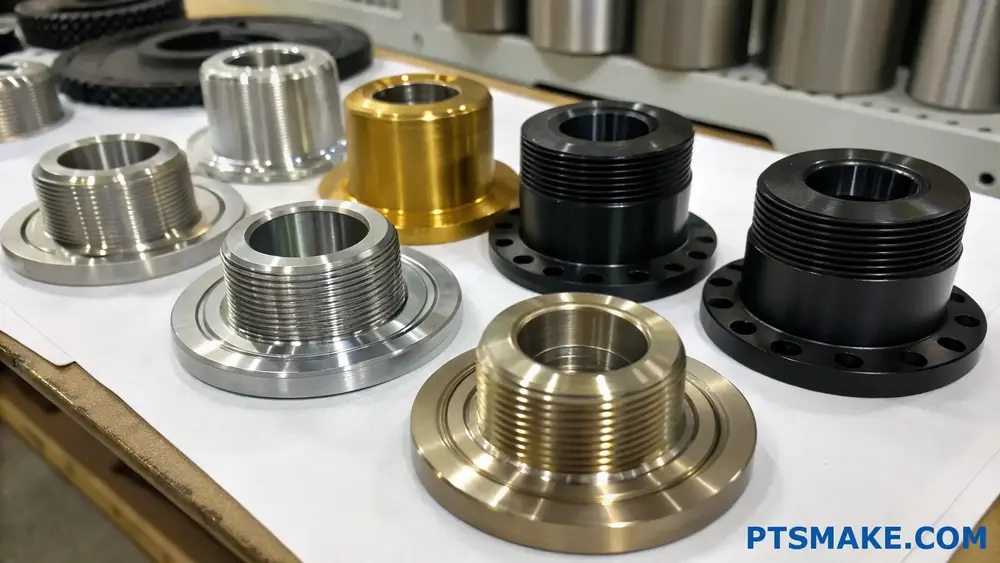
Types of Surface Finishes for CNC Turned Parts
When it comes to precision CNC turned parts, the surface finish is much more than just appearance. It directly impacts the functionality, durability, and performance of the component. At PTSMAKE, we offer various surface finishing options to meet different industry requirements.
As-Machined Finish
The as-machined finish is the most basic surface finish for CNC turned parts. It’s what you get directly after the machining process without any additional treatment. This finish typically shows visible tool marks and has a surface roughness value (Ra) ranging from 0.8 to 3.2 micrometers, depending on the cutting parameters used.
Benefits of as-machined finish include:
- Cost-effectiveness (no additional processing required)
- Suitable for non-critical surfaces or prototyping
- Faster delivery times
However, as-machined finishes may not be suitable for parts requiring specific friction properties, corrosion resistance, or aesthetic appeal.
Bead Blasting and Media Blasting
Bead blasting is a process where small spherical media (typically glass beads) are propelled at high pressure against the part surface. This creates a uniform, matte finish that effectively removes tool marks and minor surface imperfections.
Media blasting uses different materials like aluminum oxide, silicon carbide, or plastic media to achieve various surface textures. The choice of media affects the final finish and surface roughness4.
Media blasting is particularly useful for:
- Creating a consistent appearance across all surfaces
- Removing burrs and sharp edges
- Preparing surfaces for coatings or other finishes
- Creating a light-diffusing surface
Surface Coating Options
Anodizing (for Aluminum)
Anodizing is an electrochemical process that converts the surface of aluminum into a durable, corrosion-resistant oxide layer. At PTSMAKE, we offer both Type II (standard) and Type III (hard) anodizing, with various color options.
Benefits include:
- Enhanced corrosion resistance
- Improved wear resistance
- Electrical insulation
- Aesthetic appeal with color options
Powder Coating
Powder coating involves applying a free-flowing, dry powder to the metal surface and then curing it under heat. This creates a tough, protective finish that’s thicker than conventional paint.
Key advantages:
- Excellent durability and impact resistance
- Wide range of colors and textures
- Good chemical resistance
- Environmentally friendly (no solvents)
Electroplating
Electroplating deposits a thin layer of metal onto the surface of the part through an electrochemical process. Common plating materials include nickel, chrome, zinc, gold, and silver.
Each plating material offers specific benefits:
| Plating Material | Primary Benefits | Typical Applications |
|---|---|---|
| Nickel | Corrosion resistance, hardness | Automotive, electronics |
| Chrome | Wear resistance, low friction | Mechanical components, decorative parts |
| Zinc | Cost-effective corrosion protection | Fasteners, structural components |
| Gold | Excellent conductivity, corrosion resistance | Electronics, connectors |
| Silver | Superior electrical conductivity | High-performance electronics |
Mechanical Finishing Methods
Polishing
Polishing uses progressively finer abrasives to create a smooth, reflective surface. We can achieve various levels of polish, from a satin finish to a mirror-like appearance. Polishing is ideal for parts where:
- Aesthetic appearance is critical
- Reduced friction is required
- Precise dimensional control is needed
- Cleanliness is important (less likely to trap contaminants)
Brushing and Directional Finishing
Brushing creates a unidirectional satin finish with fine, parallel lines. This finish is both functional and decorative, often used in:
- Consumer products
- Architectural components
- Medical devices
- Food processing equipment
The controlled surface texture masks minor scratches and fingerprints while maintaining a professional appearance.
Chemical Treatments
Passivation (for Stainless Steel)
Passivation is a chemical process that enhances the natural corrosion resistance of stainless steel by removing free iron from the surface and promoting the formation of a protective oxide layer.
Benefits include:
- Improved corrosion resistance
- No dimensional changes
- Removal of surface contaminants
Black Oxide (for Carbon Steel)
Black oxide is a conversion coating that creates a black appearance while offering modest corrosion protection. It’s valued for:
- Maintaining dimensional accuracy (extremely thin coating)
- Minimizing light reflection
- Improving visual contrast
- Providing mild corrosion protection
Selecting the Right Surface Finish
When choosing a surface finish for precision CNC turned parts, consider these factors:
- Functional requirements (corrosion resistance, wear properties, friction characteristics)
- Environmental exposure (indoor/outdoor, chemicals, temperature extremes)
- Aesthetic requirements
- Budget constraints
- Industry standards or specifications
- Assembly requirements (fit with other components)
At PTSMAKE, I work closely with customers to recommend the most appropriate surface finish based on their specific application needs. For example, for aerospace components, we might suggest anodizing for aluminum parts or passivation for stainless steel parts to ensure optimal performance in demanding environments.
Remember that surface finish selection should occur early in the design process. This early consideration helps avoid costly redesigns or modifications later and ensures that your CNC turned parts meet both functional and aesthetic requirements.
How to Enhance Quality Control in Precision CNC Turning Projects?
Have you ever received precision turned parts that didn’t quite meet your specifications, despite investing significant resources? Are you tired of the frustration when quality issues emerge only after production is complete, leading to costly rework and delays?
Effective quality control in precision CNC turning isn’t just about inspection—it’s a comprehensive approach that begins with design and continues through delivery. By implementing strategic quality measures throughout your production process, you can significantly reduce defects while maintaining efficiency.
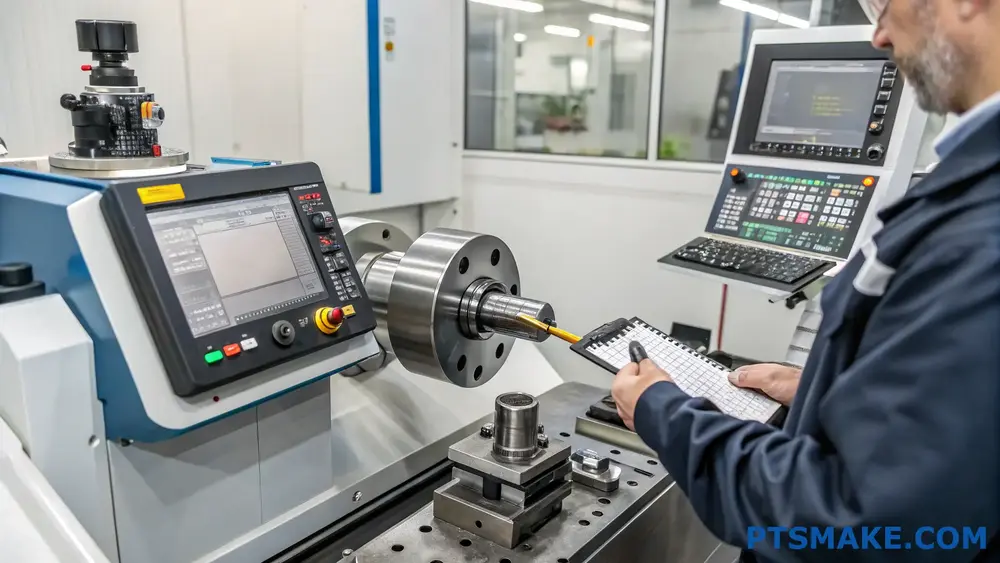
The Foundation of Quality Control in CNC Turning
Quality control in precision CNC turning projects requires a systematic approach. At PTSMAKE, I’ve developed quality control processes that address both prevention and detection.
Establishing Clear Quality Standards
The first step in any quality control system is defining what "quality" means for your specific project. This involves:
- Detailed technical drawings with proper GD&T (Geometric Dimensioning and Tolerancing)
- Material specifications and surface finish requirements
- Critical dimensions identified with appropriate tolerances
- Special features that require extra attention
When we receive projects at our facility, we immediately review these specifications with our engineering team. This collaborative review helps identify potential manufacturing challenges before production begins.
Implementing In-Process Inspection
Traditional quality control often relies heavily on final inspection. While this catches defects, it doesn’t prevent them. Statistical Process Control5 offers a more proactive approach:
- Regular sampling during production runs
- Measurement of critical dimensions at predetermined intervals
- Tracking process variations to identify trends before they become problems
- Immediate corrective action when measurements drift toward tolerance limits
This approach has helped us reduce scrap rates by nearly 30% across our CNC turning operations.
Advanced Measurement Technologies
Quality control effectiveness depends heavily on measurement precision and efficiency.
CMM (Coordinate Measuring Machine) Integration
Modern CMMs offer exceptional precision for complex geometries:
- Automated measurement of multiple dimensions
- Reduced operator error
- Digital reporting capabilities for trend analysis
- Faster inspection times for high-volume production
For cylindrical components with tight tolerances, CMMs prove invaluable in verifying dimensions that might be challenging with manual methods.
Vision Systems for Surface Defect Detection
Surface defects can be particularly problematic in precision turning. Advanced vision systems help detect:
- Microscopic scratches
- Tool marks
- Material inconsistencies
- Finish variances
These systems capture high-resolution images that reveal defects invisible to the naked eye, especially important for components with critical surface requirements.
Quality Documentation Systems
Documentation forms the backbone of effective quality control. Here’s what I recommend implementing:
Digital Quality Management Systems
Paper-based quality systems are increasingly outdated. Digital systems offer:
| Benefit | Description |
|---|---|
| Traceability | Track parts through every stage of production |
| Data Analysis | Identify recurring issues through historical data |
| Accessibility | Immediate access to quality records for all stakeholders |
| Consistency | Standardized documentation across all projects |
Our transition to digital quality management reduced our response time to quality issues by 65%.
First Article Inspection (FAI) Protocol
FAI serves as the cornerstone of production quality validation:
- Complete inspection of the first produced part against all specifications
- Detailed documentation of all measurements
- Approval process involving quality and engineering teams
- Baseline establishment for subsequent production
I always insist on a thorough FAI before approving full production runs. This single step has prevented countless quality issues from reaching volume production.
Supplier Quality Management
For components requiring outside processing or materials, supplier quality directly impacts your final product.
Vendor Qualification Process
Develop a robust system for qualifying suppliers:
- On-site capability assessments
- Sample evaluation before awarding contracts
- Clear quality expectations documented in agreements
- Regular performance reviews
At PTSMAKE, we maintain a tiered supplier system based on quality performance, with only top-tier suppliers used for our most critical components.
Incoming Material Inspection
Even with qualified suppliers, verification remains essential:
- Sampling plans based on historical supplier performance
- Material certification verification
- Dimensional checks of critical features
- Surface treatment verification when applicable
This approach provides an early warning system for supply chain quality issues before they impact your production.
Training and Continuous Improvement
Quality systems are only as effective as the people implementing them.
Operator Training Programs
Invest in comprehensive training:
- Technical skills specific to precision turning
- Measurement technique standardization
- Quality awareness training
- Problem-solving methodologies
Our operators undergo annual recertification in measurement techniques, ensuring consistency across shifts and reducing interpretation variations.
Root Cause Analysis and Corrective Action
When quality issues occur, the response determines whether they’ll recur:
- Thorough investigation of defect causes
- Implementation of corrective actions
- Verification of effectiveness
- Standardization of improvements across similar processes
This disciplined approach transforms quality problems into opportunities for system improvement.
By implementing these quality control strategies in your precision CNC turning projects, you’ll not only reduce defects but also improve efficiency and customer satisfaction. Remember that quality isn’t an inspection department—it’s a comprehensive approach that involves every aspect of your production process.
The Role of Quality Control in Precision CNC Turning?
Have you ever received machined parts that looked great but failed during assembly or testing? Or maybe you’ve experienced the frustration of inconsistent batches where some components work perfectly while others don’t quite fit? Quality issues can derail projects, delay launches, and ultimately damage your reputation with clients.
Quality control in precision CNC turning isn’t just a final checkpoint—it’s a comprehensive process integrated throughout manufacturing. From material verification to final inspection, effective QC protocols ensure components meet exact specifications, function reliably, and maintain consistency across production runs.
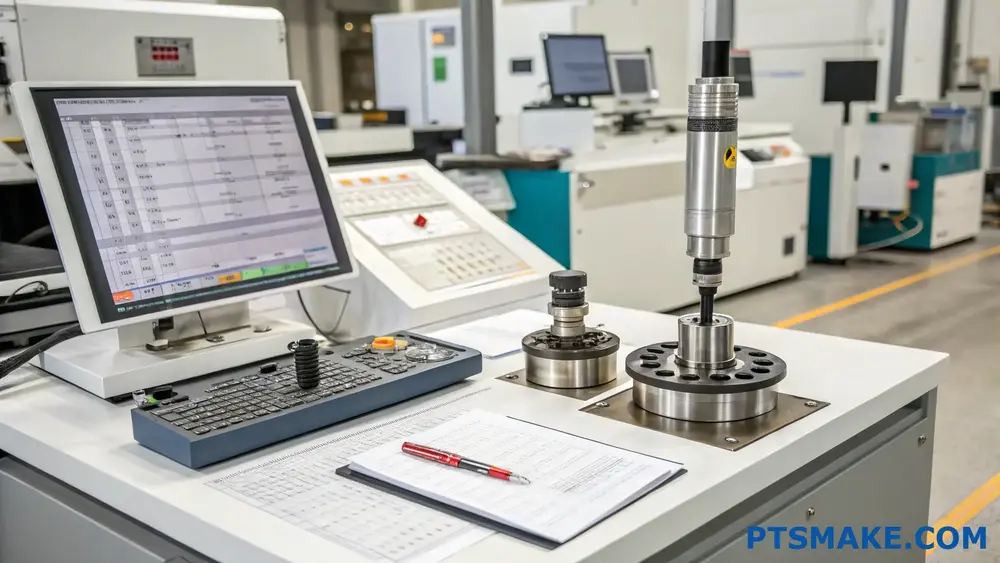
The Fundamentals of Quality Control in CNC Turning
Quality control in precision CNC turning involves several interconnected processes designed to identify and prevent defects. Unlike what many people think, quality control isn’t just inspecting finished parts. It begins with the selection of raw materials and continues through every step of the manufacturing process.
At PTSMAKE, we’ve developed a comprehensive quality management system that addresses each critical point in the CNC turning process. This system helps us maintain consistent quality across thousands of parts while reducing waste and production costs for our clients.
Pre-Production Quality Measures
Before any turning operation begins, several quality checks must be performed:
- Material Verification: Testing raw materials to confirm they meet specified standards and have the proper metallurgical properties6.
- Programming Validation: Reviewing CNC programs for accuracy and efficiency.
- Tooling Preparation: Ensuring all cutting tools are properly prepared and calibrated.
- Machine Calibration: Verifying that CNC machines are properly calibrated for the specific job.
These pre-production measures prevent problems before they occur, saving time and resources. I’ve seen projects where skipping these steps resulted in entire batches being scrapped—an expensive lesson that reinforces the importance of proactive quality control.
In-Process Quality Control Techniques
During production, continuous monitoring helps maintain quality:
Statistical Process Control (SPC)
SPC uses statistical methods to monitor and control a process. By collecting data at regular intervals during production, we can:
- Detect trends before they become problems
- Maintain process stability
- Reduce variation between parts
This approach is particularly valuable for high-volume precision turning projects where consistent quality is essential.
First Article Inspection
First article inspection involves thorough testing of the first part produced in a run. This critical step verifies that:
- The CNC program is correct
- The machine setup is accurate
- The tooling is functioning properly
- The part meets all specifications
At PTSMAKE, we document first article inspections thoroughly, providing clients with detailed reports that build confidence in the production process.
In-Process Sampling
Regular sampling throughout production helps identify any drift in quality. The frequency of sampling depends on several factors:
| Production Volume | Typical Sampling Rate | Inspection Method |
|---|---|---|
| Low (under 100 pcs) | 10-20% | Visual and dimensional |
| Medium (100-1,000 pcs) | 5-10% | Dimensional and functional |
| High (over 1,000 pcs) | 1-5% | Statistical sampling with CMM |
Advanced Inspection Technologies
Modern quality control for precision CNC turning employs sophisticated measurement technologies:
Coordinate Measuring Machines (CMM)
CMMs provide extremely accurate dimensional inspection by using a probe to measure points on a part’s surface. These machines can:
- Measure features with accuracy to 0.001mm
- Create detailed inspection reports
- Compare results directly to CAD models
- Identify deviations that would be impossible to detect manually
Vision Systems
Automated vision systems use cameras and software to inspect parts quickly and consistently. They excel at:
- Surface finish inspection
- Detecting visual defects
- Thread inspection
- High-speed sorting based on visual criteria
Surface Roughness Testing
Surface quality is critical for many precision-turned components. Modern profilometers can:
- Measure surface roughness in Ra, Rz, and other parameters
- Create detailed surface profiles
- Verify compliance with surface finish requirements
Documentation and Traceability
Quality control isn’t complete without proper documentation. For precision CNC turning, this includes:
- Material Certificates: Documentation of material composition and properties
- Process Documentation: Records of all manufacturing steps and parameters
- Inspection Reports: Detailed measurements and test results
- Non-Conformance Reports: Documentation of any issues and their resolution
- Lot Traceability: Systems to track components from raw material through shipping
In aerospace, medical, and defense applications, this documentation isn’t just good practice—it’s often a regulatory requirement. Our quality system at PTSMAKE maintains thorough records that provide peace of mind for clients in these demanding industries.
Common Quality Challenges in Precision Turning
Even with robust quality systems, certain challenges frequently arise:
Dimensional Accuracy Issues
Maintaining tight tolerances (often under ±0.005mm) requires addressing:
- Thermal expansion during machining
- Tool wear compensation
- Machine rigidity and vibration
- Material behavior during cutting
Surface Finish Concerns
Achieving specific surface finishes requires control of:
- Cutting tool selection and condition
- Feed rates and cutting speeds
- Coolant application
- Material properties
Material-Specific Challenges
Different materials present unique quality challenges:
- Stainless Steel: Tendency to work harden requires specific cutting strategies
- Aluminum: Softer materials can deform during clamping
- Titanium: Heat buildup can affect dimensional stability
- Plastics: Material consistency and temperature sensitivity
Continuous Improvement in Quality Systems
The best quality control systems are never static. At PTSMAKE, we continuously refine our approaches through:
- Root Cause Analysis: Investigating any quality issues to prevent recurrence
- Regular Calibration: Maintaining measurement equipment accuracy
- Staff Training: Ensuring quality personnel have current skills and knowledge
- Technology Integration: Implementing new inspection and control technologies
- Client Feedback Integration: Using customer input to improve processes
This commitment to improvement has allowed us to achieve exceptional quality levels while maintaining competitive pricing—proving that quality and efficiency can go hand-in-hand when properly managed.
How to Ensure Quality Control in Precision CNC Turning Processes?
Have you ever received precision turned parts that didn’t meet your specifications? Or worse, discovered quality issues only after components were assembled into your final product? These situations not only cause delays but can devastate project timelines and budgets when critical components fail.
Quality control in precision CNC turning isn’t just a manufacturing step—it’s a comprehensive methodology that ensures consistency, accuracy, and reliability throughout the production process. Effective QC systems combine rigorous inspection protocols, proper documentation, statistical process control, and continuous improvement to deliver parts that consistently meet or exceed specifications.
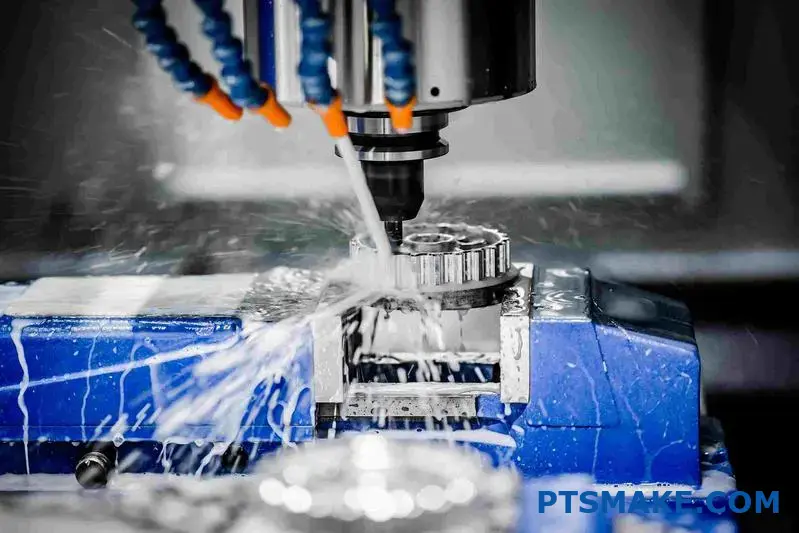
The Foundation of Quality Control in CNC Turning
Quality control in precision CNC turning begins long before the first chip is cut. At PTSMAKE, we’ve developed a comprehensive approach that integrates quality considerations at every stage of production. The foundation of effective quality control rests on three key pillars: prevention, monitoring, and correction.
Prevention focuses on eliminating potential issues before they occur. This includes thorough design reviews, material verification, and process validation. Monitoring involves continuous assessment during production using both in-process checks and statistical methods. Correction addresses any deviations quickly and implements systematic improvements to prevent recurrence.
Pre-Production Quality Preparations
Before starting any CNC turning job, several critical quality measures must be implemented:
- Design for Manufacturability (DFM) Analysis: Reviewing part designs to identify potential manufacturing challenges that could affect quality.
- Material Certification Verification: Ensuring that raw materials meet specified requirements and have proper documentation.
- Tool Selection and Verification: Choosing appropriate cutting tools for the specific material and geometry requirements.
- First Article Inspection Planning: Establishing detailed inspection procedures for the first produced parts.
Our engineering team always performs a comprehensive DFM review to identify features that might cause dimensional instability7 or other quality issues. This proactive approach prevents many problems before they occur.
In-Process Quality Monitoring Techniques
Maintaining quality during production requires vigilant monitoring. The most effective techniques include:
Statistical Process Control (SPC)
SPC involves collecting and analyzing data from the machining process to identify trends and potential issues before they result in defective parts. Key metrics to monitor include:
- Control charts for critical dimensions
- Tool wear monitoring
- Vibration analysis
- Temperature stability
Automated Inspection Systems
Modern CNC turning centers can incorporate in-line inspection capabilities that provide real-time feedback on part quality:
- Touch probes for dimensional verification
- Vision systems for surface inspection
- Laser measurement for precise geometry validation
Operator Inspection Protocols
Despite technological advances, skilled operators remain essential to quality control. A structured inspection protocol might include:
| Inspection Point | Frequency | Method | Documentation |
|---|---|---|---|
| Critical dimensions | Every 5th part | Micrometer/caliper | Digital measurement record |
| Surface finish | Every 10th part | Visual + roughness tester | Quality checklist |
| Thread quality | Every part | Go/No-go gauge | Pass/fail record |
| Geometric tolerances | First and last part of batch | CMM | Inspection report |
Post-Production Quality Verification
After machining is complete, comprehensive inspection protocols ensure that finished parts meet all specifications before shipping.
Final Inspection Methods
Final quality verification typically involves a combination of techniques:
- Dimensional Inspection: Using precision measuring equipment like CMMs, optical comparators, and micrometers.
- Surface Finish Analysis: Employing profilometers and visual inspection under appropriate lighting.
- Functional Testing: When applicable, testing parts in simulated operational conditions.
- Material Verification: Conducting hardness testing and other non-destructive evaluations.
For high-precision applications, temperature-controlled inspection rooms are essential. At PTSMAKE, our inspection area is maintained at a constant 20°C (68°F) to eliminate thermal expansion issues that could affect measurement accuracy.
Documentation and Traceability
Comprehensive documentation forms the backbone of effective quality control:
- Inspection Reports: Detailed records of all measurements and test results.
- Material Certificates: Documentation of material composition and properties.
- Process Parameters: Records of machine settings, cutting tools, and fixtures used.
- Non-conformance Reports: Documentation of any deviations and their resolution.
This documentation not only serves as evidence of quality but also provides valuable data for continuous improvement efforts and traceability if issues arise later.
Implementing Continuous Improvement
Quality control isn’t static—it must evolve continuously. Effective improvement strategies include:
- Root Cause Analysis: Systematically investigating the underlying causes of any quality issues.
- Corrective Action Plans: Developing specific, measurable steps to address identified problems.
- Preventive Actions: Implementing system-wide changes to prevent similar issues.
- Regular Process Audits: Conducting thorough reviews of all quality procedures.
I’ve found that implementing regular "quality circles"—cross-functional team meetings focused specifically on quality improvement—drives significant advancements in our turning processes. These collaborative sessions help identify subtle issues that might otherwise go unnoticed.
Technology and Tools for Modern Quality Control
Advanced technology has transformed quality control in precision CNC turning:
Coordinate Measuring Machines (CMMs)
CMMs provide comprehensive dimensional verification with extremely high accuracy. Modern systems can:
- Automatically measure hundreds of features
- Generate detailed inspection reports
- Compare results directly to CAD models
- Identify trends across production runs
Vision Systems
Optical measurement systems excel at:
- Inspecting complex profiles quickly
- Verifying surface conditions
- Detecting minute defects
- Providing non-contact measurement of delicate features
Data Management Systems
Quality data management systems allow for:
- Real-time monitoring of production quality
- Statistical analysis across multiple jobs
- Identification of long-term trends
- Documentation for ISO compliance
At PTSMAKE, we’ve integrated these technologies into a unified quality management system that provides real-time visibility into our turning processes, enabling us to maintain consistent quality even for the most demanding applications.
What Are the Lead Times for Precision CNC Turning Orders?
Have you ever found yourself rushing against the clock, desperately waiting for critical CNC turned components that were promised "as soon as possible"? Or maybe you’ve experienced the frustration of vague delivery estimates that leave your production schedule in limbo?
Lead times for precision CNC turning orders typically range from 1-3 days for simple prototypes to 4-6 weeks for complex production runs. Factors affecting these timeframes include part complexity, material selection, order quantity, finishing requirements, and current shop capacity.
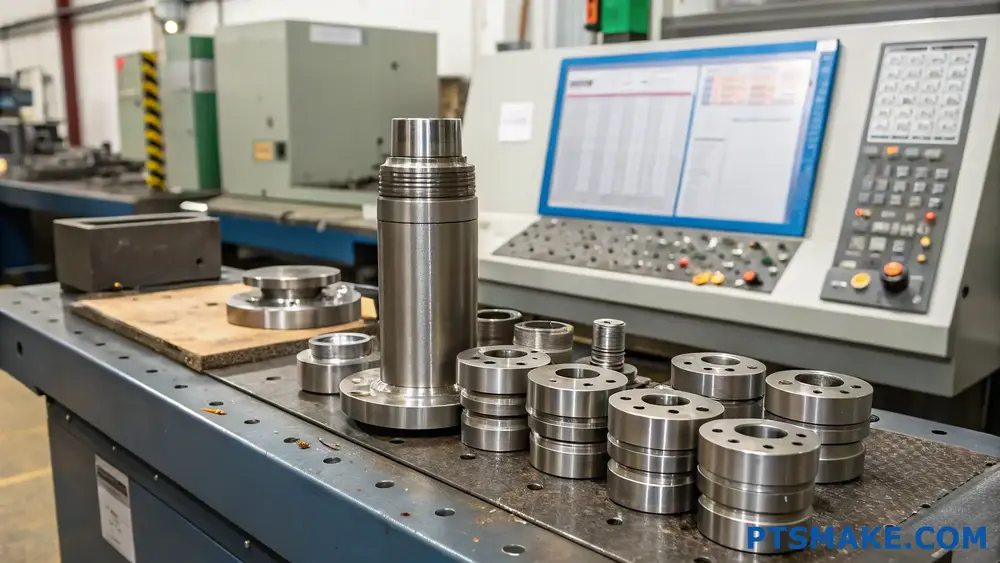
Factors Influencing CNC Turning Lead Times
Understanding the elements that affect lead times helps you plan your projects more effectively. In my experience working with thousands of precision manufacturing projects, several key factors consistently influence how quickly your turned parts can be delivered.
Material Availability and Preparation
The material you select for your CNC turning project significantly impacts lead time. Standard materials like aluminum 6061, brass C360, or stainless steel 303 are typically stocked by most shops and ready for immediate use. However, specialty materials like Inconel, titanium alloys, or specific plastic polymers often require ordering from suppliers, adding 3-7 days to your timeline.
Material preparation also plays a role. For example, at PTSMAKE, we maintain an extensive inventory of common materials to minimize delays, but even we occasionally need to source special alloys for unique applications.
Complexity of Parts
Part complexity directly correlates with programming and machining time. A simple cylindrical part with basic features might be programmed in under an hour, while complex geometries with tight tolerances, thin walls, or intricate features can require days of programming and setup time.
Consider these complexity levels and their impact on lead times:
| Complexity Level | Features | Typical Lead Time Addition |
|---|---|---|
| Simple | Basic cylindrical shapes, few features | Minimal impact |
| Moderate | Multiple diameters, holes, slots | 1-3 day addition |
| Complex | Tight tolerances, threading, thin walls | 3-7 day addition |
| Advanced | Multiple setups, 5-axis requirements, intricate details | 7-14 day addition |
Order Quantity and Batch Size
The relationship between quantity and lead time isn’t always linear. For small quantities (1-10 pieces), the setup time often dominates the overall lead time. As quantities increase, the machining time becomes the primary factor.
Interestingly, medium batch sizes (50-500 units) often represent the sweet spot for efficiency in CNC turning. Once quantities exceed certain thresholds, additional considerations like tool wear8 and machine capacity planning become significant factors.
Post-Processing Requirements
Any secondary operations after the initial turning process will extend lead times. Common post-processing steps include:
- Heat treatment: Adds 2-5 days
- Surface finishing (anodizing, plating, painting): Adds 3-7 days
- Quality inspection and certification: Adds 1-3 days
- Custom packaging requirements: Adds 1-2 days
At PTSMAKE, we’ve optimized our workflow to perform many of these operations in parallel rather than sequentially, which helps minimize the cumulative impact on lead times.
Realistic Lead Time Expectations by Project Type
Prototyping (1-10 parts)
For simple prototype parts using readily available materials, expect:
- Simple designs: 1-3 business days
- Moderate complexity: 3-5 business days
- Complex designs: 5-10 business days
The priority level of your order can significantly impact these timeframes. Many shops, including ours, offer expedited services for critical prototypes, sometimes delivering parts within 24 hours, though typically at premium pricing.
Small Production Runs (10-100 parts)
Small production runs generally follow these timeframes:
- Simple designs: 3-7 business days
- Moderate complexity: 7-14 business days
- Complex designs: 2-3 weeks
At this quantity level, the setup-to-production time ratio starts to balance out, making the per-part cost more economical while still maintaining relatively quick turnaround times.
Medium to Large Production (100+ parts)
For larger production quantities:
- Simple designs: 2-3 weeks
- Moderate complexity: 3-4 weeks
- Complex designs: 4-6 weeks
With larger orders, material sourcing becomes more critical, and machine capacity planning plays a bigger role. However, per-part costs typically decrease significantly at these volumes.
Strategies to Reduce Lead Times
Based on my experience helping clients optimize their manufacturing workflows, here are some practical approaches to reduce CNC turning lead times:
Design for manufacturability: Simplify geometries where possible, avoid unnecessarily tight tolerances, and consider standard material sizes.
Provide complete technical documentation: Incomplete or ambiguous specifications lead to time-consuming clarification loops.
Consider material alternatives: Being flexible with material selection can help avoid delays from specialty material sourcing.
Plan ahead for post-processing: Include finishing requirements in your initial planning rather than adding them later.
Develop relationships with reliable suppliers: At PTSMAKE, we prioritize jobs from regular clients who provide consistent work, often fitting urgent requests into our production schedule.
Communication and Planning Best Practices
Clear communication with your CNC turning provider is essential for realistic lead time expectations. When reaching out for quotes, be sure to:
- Specify your actual delivery requirements rather than simply asking for "ASAP"
- Communicate project priorities if ordering multiple parts
- Discuss options for partial deliveries if they would help your production flow
- Be transparent about your end application to help identify potential optimization opportunities
The most successful projects I’ve overseen at PTSMAKE involved clients who shared their bigger-picture timeline, allowing us to plan the manufacturing process to align perfectly with their assembly schedules.
Can Precision CNC Turning Handle Complex Geometries and Thin Walls?
Have you ever faced the frustration of machining parts with intricate details or delicate features? Those moments when your designs challenge traditional manufacturing boundaries, and you wonder if precision turning can truly deliver what you’ve envisioned?
Yes, modern precision CNC turning can effectively handle complex geometries and thin walls. With advanced multi-axis machines, specialized tooling, and proper setup techniques, today’s turning operations can successfully produce components with intricate features and wall thicknesses as thin as 0.2mm while maintaining tight tolerances.
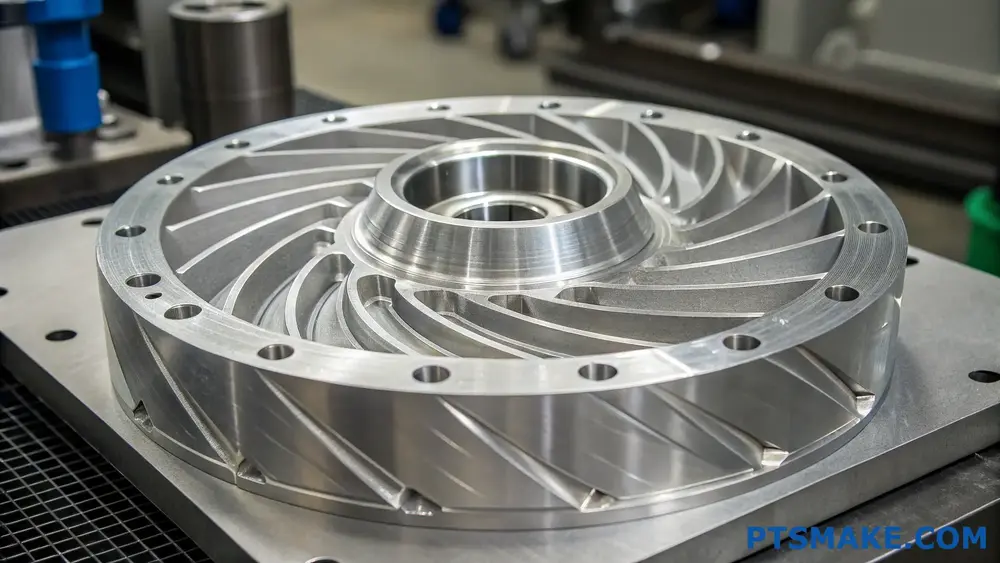
Understanding the Capabilities of Modern CNC Turning
When discussing complex geometries and thin-walled components, it’s important to recognize how far CNC turning technology has advanced. Traditional turning operations were once limited to simple cylindrical shapes, but today’s CNC turning centers have evolved dramatically.
Modern multi-axis CNC turning machines combine both turning and milling capabilities, allowing for the creation of incredibly complex geometries that were previously impossible with conventional turning alone. These machines often feature live tooling, sub-spindles, and Y-axis movement that significantly expand their capabilities beyond basic turning operations.
At PTSMAKE, I’ve witnessed the transformation of turning technology over the years. Our advanced turning centers can handle components with complex profiles, undercuts, eccentric features, and extremely thin walls without compromising dimensional accuracy or surface finish quality.
Key Factors Enabling Complex Geometry Machining
Several technological advancements have made complex geometry turning possible:
Multi-Axis Capabilities: Modern CNC turning centers featuring 5-axis or more provide the ability to approach workpieces from multiple angles, enabling complex contours and features.
Live Tooling: This allows for milling operations within the same setup, eliminating the need for secondary operations and improving overall accuracy.
Advanced CAD/CAM Systems: These software solutions enable programmers to develop sophisticated toolpaths that optimize tool engagement and minimize cutting forces on delicate features.
Tool Monitoring Systems: Real-time monitoring helps detect tool wear or potential failures before they damage thin-walled sections.
Simultaneous interpolation9: This advanced programming technique allows for smooth, continuous tool movement across complex surfaces.
Achieving Successful Thin-Wall Turning
Producing thin-walled components through CNC turning requires special attention to several critical factors. Based on my experience at PTSMAKE, here are the key considerations for successful thin-wall turning:
Material Selection Considerations
The material you select significantly impacts your ability to achieve thin walls. Some materials are more suitable than others:
| Material Type | Minimum Practical Wall Thickness | Challenges |
|---|---|---|
| Aluminum Alloys | 0.2-0.3mm | Workholding without deformation |
| Stainless Steel | 0.3-0.5mm | Heat management, tool wear |
| Titanium | 0.4-0.6mm | Heat concentration, tool wear |
| Brass/Copper | 0.2-0.3mm | Burr formation, chip control |
| Engineering Plastics | 0.3-0.5mm | Deflection, heat sensitivity |
Specialized Tooling Requirements
Achieving thin walls demands tooling optimization:
Sharp Cutting Edges: Dull tools create excessive cutting forces that can deflect or deform thin walls.
Positive Rake Angles: These reduce cutting forces and minimize workpiece deflection.
Small Nose Radii: For intricate details and tight internal corners.
Custom Tool Geometry: Sometimes standard tooling isn’t sufficient, and custom tools must be designed for specific features.
Workholding Strategies for Delicate Components
One of the biggest challenges in thin-wall turning is proper workholding. Standard chucks or collets can easily deform thin-walled parts. Here are effective strategies we employ:
Custom Soft Jaws: Designed to match the exact contour of the workpiece, distributing clamping pressure evenly.
Mandrel Support: For internal clamping of thin-walled tubular components.
Vacuum Fixtures: Providing distributed holding force without concentrated pressure points.
Tailstock Support: Using live centers for additional stability during machining.
Sequential Machining: Strategically removing material to maintain structural integrity throughout the process.
Advanced Programming Techniques
The programming approach is equally crucial for successful thin-wall turning:
Light Finishing Passes: Minimizing cutting forces through multiple light passes rather than aggressive cuts.
Optimized Cutting Parameters: Adjusted speeds and feeds to reduce vibration and workpiece deflection.
Balanced Cut Direction: Alternating cutting directions to neutralize deflection forces.
Tool Path Optimization: Creating continuous toolpaths that minimize tool entry and exit, reducing shock loading.
Real-World Applications and Limitations
While modern CNC turning is incredibly capable, it’s important to understand its practical limitations. Here’s a realistic assessment based on my experience:
Achievable Geometries
CNC turning excels at producing:
- Tapered profiles with varying diameters
- External and internal threads
- Undercuts and grooves
- Contoured surfaces with complex radii
- Eccentric features (with live tooling)
- Thin-walled cylindrical or tubular components
Practical Limitations
Despite advanced capabilities, some limitations remain:
- Extremely deep internal features may be difficult to access
- Very thin walls (below 0.2mm) may require alternative manufacturing methods
- Highly complex non-round features might require additional milling operations
- Certain materials with poor machinability present greater challenges for thin-wall applications
At PTSMAKE, we carefully evaluate each project to determine if precision turning is the optimal manufacturing method or if alternative approaches might better serve the requirements. Sometimes, a hybrid approach combining turning with other processes yields the best results for particularly complex components.
What Certifications Guarantee Reliability in Precision CNC Turning Services?
Have you ever received precision turned parts that simply didn’t meet your specifications? Or worse, worked with a supplier who claimed quality credentials but delivered substandard components that failed during assembly or use? These situations not only cause project delays but can damage your reputation with clients and stakeholders.
When selecting a CNC turning service provider, certifications serve as crucial indicators of reliability and quality assurance. The most valuable certifications include ISO 9001 for quality management, AS9100 for aerospace applications, ISO 13485 for medical devices, and IATF 16949 for automotive components—all verifying a manufacturer’s commitment to consistent precision and process control.
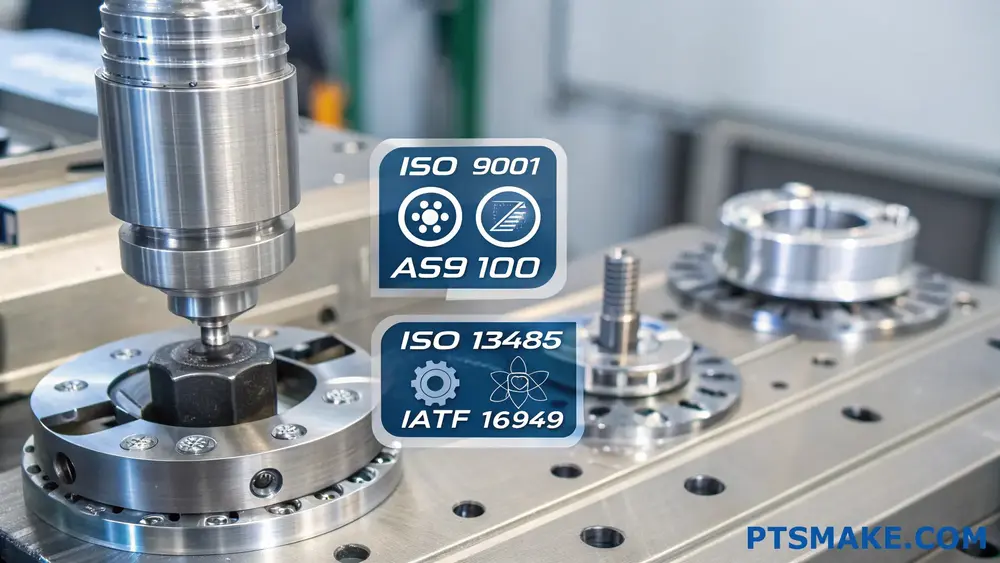
The Significance of Quality Certifications in CNC Turning
Quality certifications in precision CNC turning aren’t just fancy badges displayed on a company website. They represent structured systems and processes that ensure consistent quality and reliability. In my experience working with precision manufacturing at PTSMAKE, I’ve seen how properly implemented certification systems transform operations from merely productive to consistently excellent.
Certifications provide a standardized framework for manufacturing processes, quality control procedures, and continuous improvement initiatives. They require companies to document their processes, train their staff properly, and maintain records of quality checks and issues. This systematic approach minimizes human error and ensures that every part meets specifications, regardless of who operates the machine or when the part is produced.
Core ISO Certifications for Precision Manufacturing
The International Organization for Standardization (ISO) provides several certifications relevant to CNC turning services:
ISO 9001: The Foundation of Quality Management
ISO 9001 is the most fundamental certification for any quality-focused manufacturer. It establishes requirements for a quality management system (QMS) that helps organizations:
- Document processes consistently
- Identify and address risks proactively
- Implement continuous improvement methodologies
- Ensure customer satisfaction through quality products
At PTSMAKE, our ISO 9001 certification serves as the backbone of our quality systems. It guides everything from how we review customer requirements to how we measure and inspect finished parts. This standardization10 creates predictability in outcomes—a crucial factor when precision is measured in microns.
ISO 14001: Environmental Management Systems
While not directly related to part quality, ISO 14001 certification demonstrates a manufacturer’s commitment to environmental responsibility. This matters increasingly to customers who need to report on their supply chain sustainability. A CNC turning service with ISO 14001:
- Minimizes waste in machining processes
- Properly manages and disposes of cutting fluids
- Implements energy efficiency measures
- Complies with environmental regulations
Industry-Specific Certifications
Different industries have specialized requirements that go beyond the baseline ISO standards:
AS9100: Aerospace Quality Management
For aerospace components, AS9100 certification (which includes all ISO 9001 requirements plus aerospace-specific additions) is often non-negotiable. This certification addresses:
- Rigorous traceability requirements
- Risk management specific to flight safety
- Control of special processes like heat treatment
- Prevention of counterfeit parts
IATF 16949: Automotive Industry Requirements
Automotive manufacturers require suppliers with IATF 16949 certification, which focuses on:
- Defect prevention rather than detection
- Reduction of variation and waste
- Specific tools like FMEA (Failure Mode and Effects Analysis)
- Supply chain management requirements
ISO 13485: Medical Device Quality Systems
For medical component manufacturers, ISO 13485 certification ensures:
- Stringent cleanliness and contamination controls
- Validation of manufacturing processes
- Enhanced traceability for implantable components
- Comprehensive risk management
Verification of Technical Capabilities
Beyond management system certifications, technical capability certifications verify specific skills and equipment calibration:
NADCAP Accreditation
The National Aerospace and Defense Contractors Accreditation Program (NADCAP) provides specialized accreditation for processes like:
- Non-destructive testing
- Heat treatment
- Chemical processing
- Surface treatments
Having NADCAP accreditation for these special processes demonstrates exceptional technical capability and process control.
Precision Measurement Certifications
A reliable CNC turning service should maintain certifications for their measurement equipment. Look for:
- Calibration certificates traceable to national standards
- Gage R&R (repeatability and reproducibility) studies
- CMM programming certifications
- Regular calibration schedules and records
How to Verify a Supplier’s Certifications
When evaluating potential CNC turning partners, I recommend taking these steps to verify certifications:
- Request current certificates with expiration dates
- Check the certification body’s website to confirm validity
- Ask for recent audit reports and corrective actions
- Inquire about any conditions or limitations on certifications
Certification status can be presented in table format for easy comparison:
| Certification | Purpose | Typical Validity Period | Verification Method |
|---|---|---|---|
| ISO 9001 | Quality Management System | 3 years with annual surveillance | Certificate lookup on registrar website |
| AS9100 | Aerospace QMS | 3 years with semi-annual audits | OASIS database verification |
| ISO 13485 | Medical Device QMS | 3 years with annual surveillance | Certificate lookup on registrar website |
| IATF 16949 | Automotive QMS | 3 years with annual surveillance | IATF database verification |
The Connection Between Certifications and Performance
While certifications provide a good baseline assessment, they should be viewed as necessary but not sufficient for guaranteeing quality. In my years at PTSMAKE, I’ve observed that the true value comes from how deeply a company embraces the principles behind the certifications, not just complying with requirements during audits.
The best CNC turning partners demonstrate:
- Integration of certification requirements into daily operations
- Continuous improvement beyond certification requirements
- Regular internal audits and self-assessments
- Investment in ongoing training and capability development
Emerging Certification Trends in Precision Manufacturing
The certification landscape continues to evolve. Forward-thinking CNC turning services are pursuing:
- Cybersecurity certifications (like ISO 27001) to protect design data
- Industry 4.0 readiness certifications
- Additive-subtractive hybrid manufacturing certifications
- Sustainability and carbon footprint certifications
At PTSMAKE, we continuously evaluate emerging certification standards to ensure we remain at the forefront of precision manufacturing capabilities.
Click to learn more about designing parts for optimal rotational symmetry in CNC turning. ↩
Learn about long-term material property stability in precision applications. ↩
Click for our comprehensive material machinability guide. ↩
Click for a detailed explanation of how surface roughness affects part performance. ↩
Learn measurement techniques that prevent costly errors. ↩
Learn more about material properties that affect machining performance. ↩
Understanding this concept helps prevent costly machining errors. ↩
Learn how tool wear affects machining precision and project timelines. ↩
Click here to learn advanced programming techniques for complex geometric machining. ↩
Standardized processes that ensure consistent quality output in manufacturing environments. ↩


